When apples and cinnamon start simmering on the stove, the perfume is half the treat—and if you know that feeling, you’ll love how easy and lush this stovetop apple pie filling with brown sugar is. There’s something old-fashioned yet quick about bubbling up fruit filling right in your own kitchen, especially on a chilly, gray afternoon when even the walls crave warmth. This filling goes well beyond pie—though pie is where it really lives its best life. I find myself spooning it over bowls of vanilla ice cream, swirling it into yogurt, or sneaking a few bites straight from the saucepan when no one’s looking.
If you’re the sort who finds store-bought apple filling a bit too sweet, too gummy, or just not apple-y enough, making your own on the stovetop might spoil you forever. Rich brown sugar melts into tart apples, cinnamon and nutmeg deepen the flavor, and those glossy, soft apple slices feel like autumn in every spoonful. Plus, you’re just minutes away from turning a bag of apples into something cozy enough for Sunday pie or spontaneous dessert emergencies. Sometimes I make a batch in the morning just to have a reason to bake later—or to enjoy those golden chunks chilled with a drizzle of cream.
When Stovetop Apple Pie Filling with Brown Sugar Brings Everyone to the Kitchen
There’s a certain hush that falls over a kitchen right as the scent of apples, brown sugar, and warm spices starts to thread through the air. It’s something you feel in your chest—apple pie filling simmering in a saucepan, dappled with cinnamon and allspice, thickening to a perfect glossy shine. It draws people in. Maybe someone lingers at the stove, asking for a spoonful “just to taste.” Maybe the cat perches nearby, useless but hopeful. Even when you’re making it only for yourself, stovetop apple pie filling with brown sugar feels like company.
This is a recipe I turn to when I’ve got apples in the fruit bowl begging for purpose or when dessert needs to be more about comfort than decorum. It’s the kind of thing you make on instinct, tasting as you go, letting the apple variety define the character—sometimes a little tang from Granny Smith, other times mellow sweetness from Honeycrisp. Once you see those apple slices turn golden and syrupy, it’s impossible not to imagine them spooned over crunchy oatmeal in the morning or tumbled into a crumble after dinner with friends.
The Ingredients That Make This Apple Pie Filling Sing
- Apples (Granny Smith or Honeycrisp) – firm enough to hold texture as they cook, with a tart-sweet balance that keeps things lively. Use whatever apples you like, but go for a mix if you want a more complex flavor.
- brown sugar – gives the filling a deep, caramel undertone and a molasses warmth you just can’t find in plain white sugar.
- Granulated sugar – perks up the flavor and balances the tartness, making sure things don’t venture too far into “candied apple” territory.
- Cornstarch – thickens everything up to that ideal, shoulder-coating, not-runny gloss; arrowroot or tapioca starch can pinch-hit if needed.
- Lemon juice – brings brightness and stops the apples from turning brown, giving the filling a touch of tang.
- Cinnamon – classic pairing with apples; can’t skip it unless you want something utterly different.
- Nutmeg – a little goes a long way for earthy warmth.
- Allspice – not strictly required, but just a pinch boosts the cozy factor by a mile.
- Salt – a small pinch is all it takes to make the flavors pop.
- Water – helps dissolve the sugars and gets the cooking started; a little apple cider works, too, for more fruit flavor.
- Unsalted butter – swirled in at the end for a silky sheen and a subtle, rich backbone that coats every slice.
See the recipe card below for the full list of ingredients and measurements.
Bringing the Filling Together on the Stovetop
Start by gathering your apples—peel, core, and slice them into even, not-too-thick pieces. The trick is getting them the right size: skinny enough to soften, chunky enough not to dissolve. Tumble the apple slices into a big saucepan, and right away, scatter over the sugars, cornstarch, lemon juice, cinnamon, nutmeg, allspice, and salt. Use your hands or a big spoon to coat everything, so the apples are glossy and the spices cling.
Now, pour in the water and set the pan over medium heat. Stir gently but regularly, making sure nothing scorches at the bottom. The sugars and cornstarch will meld into a smooth, spiced syrup, and as the mixture heats, you’ll see the filling begin to thicken and turn gently translucent. Bubbles will start popping at the surface after a few minutes, filling the air with the most homey aroma you can imagine.
Once everything looks thick and the apples are soft but not falling apart, dial the heat down low. Add butter and fold it in while it melts, coaxing that extra bit of shine and richness into the mix. Take the pan off the heat—remember, it thickens more as it cools. At this point, taste a piece! Maybe you want a touch more cinnamon or a pinch of salt. This is your filling now.
Cool the filling a little before you use it, unless you’re going straight into pie. If you’re making it ahead, let it cool completely, then pop it in the fridge or freezer.
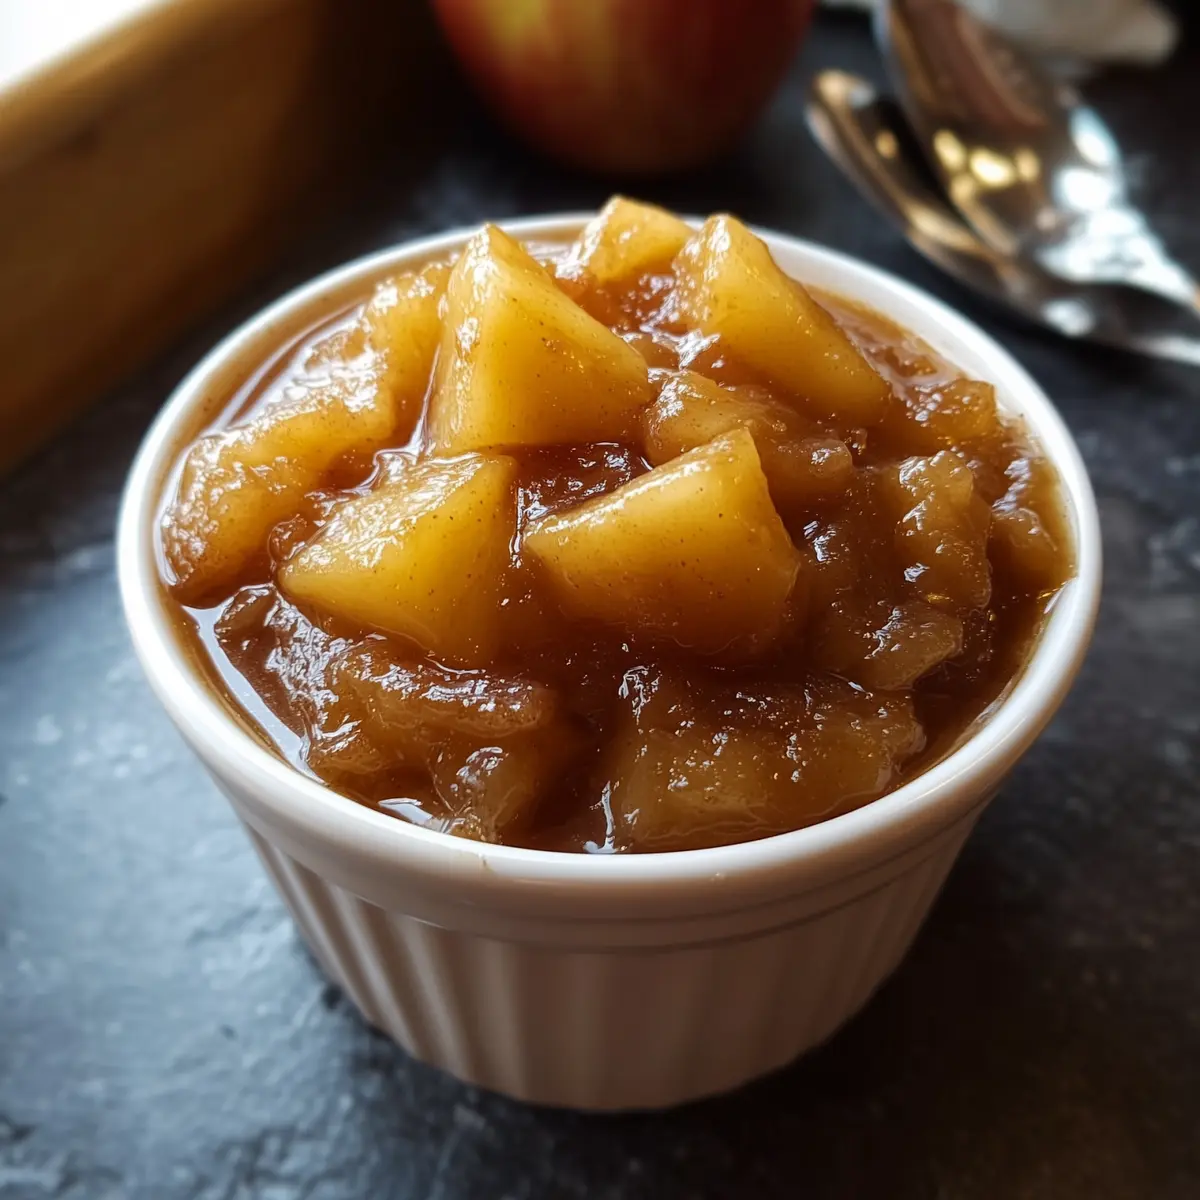
The Moment the Stovetop Apple Pie Filling Finds Its True Texture
There’s a transformation that happens between “apple sauce” and “pie filling.” You’re watching for that moment when apple slices wobble gently in a glossy, clear syrup and your spoon drags slowly through the pan—leaving a line that takes a second or two to fill back in. The cornstarch should make the filling cling to the fruit, not pool underneath. It’s all about texture—soft apples with just a bit of bite left, syrup thick, but still pourable, no rubbery goo in sight.
If you sniff the pan, you get sweet toastiness from the brown sugar and almost savory undertones from the butter. The spices shouldn’t shout; they’re just there for comfort. Serve it warm, and every bite tastes like a hug. Serve it chilled, and you get that sticky, almost chewy quality that makes a next-day pie taste even better.
Little Details That Make This Filling Stand Out
Getting stovetop apple pie filling with brown sugar just right is all about the small things. Start with apples that feel heavy in your hand and don’t have bruises—freshness counts. If you want deeper flavor, try browning the butter before adding it for a nuttier note. Stir gently and resist overcooking; apples should be tender, never mushy. If things start looking thin, let the filling simmer a minute longer; if the syrup’s too thick, splash in a bit more water.
Lemon juice saves you from blandness, and a pinch of salt is the unsung hero here. For extra spice, swap in a dash of cardamom or ginger, or leave out the allspice for a simpler profile. Prefer a lighter color? Cut back on the brown sugar and bump up the granulated. And honestly, if you ever only have one kind of apple, don’t sweat it—good filling is forgiving.
For storing, cool the filling to room temperature, then seal it in an airtight jar or container. It lasts several days in the fridge, and you can freeze it for busier times (just let it thaw slowly in the fridge).
Ideas for Serving This Apple Pie Filling Beyond the Pie
I’d be lying if I claimed this stovetop apple pie filling with brown sugar is only for pies. It’s absolutely dreamy in a double-crust or lattice—warm from the oven, juices bubbling up around flaky pastry. But don’t stop there. Layer it into parfaits or yogurt bowls if you want dessert-with-breakfast energy. Swirl it into bowls of hot porridge or oatmeal for a sweet start to your morning.
Spoon it generously over pancakes, waffles, or French toast, letting the sauce seep into every nook. Dollop it on vanilla ice cream (warm or cold) for the simplest sundae. Or use it in trifles, tossed with pound cake cubes and whipped cream.
If you need a quick crisp or cobbler filling, this one goes from fridge to oven in a flash. You can even fill turnovers or galettes—shortcuts welcome. Around holidays, I’ve even served it alongside roast pork or ham, where the sweet-tart apples cut through the richness.
FAQs about Stovetop Apple Pie Filling with Brown Sugar
Can I store stovetop apple pie filling with brown sugar in the fridge or freezer?
Absolutely! Let the filling cool to room temperature first. It keeps well in the fridge (sealed tight) for up to five days. For longer storage, freeze it in portioned containers; thaw overnight in the refrigerator before using.
What apples work best for stovetop apple pie filling?
You want apples that hold their shape and have a nice blend of tartness and sweetness—Granny Smith and Honeycrisp are my favorites here. Go with a mix for more layered flavor, but any firm apple will work if needed.
Is it possible to make this filling without cornstarch or with another thickener?
Definitely! Arrowroot starch or tapioca starch are good substitutes if cornstarch isn’t available. Just keep in mind that thickening power varies; adjust the amount a little to get the consistency you want.
How do I reheat the filling for pies or toppings?
To gently warm stovetop apple pie filling with brown sugar, pop it in a saucepan over low heat, stirring now and then until hot. A splash of water or cider helps loosen it up if it’s thick from chilling. It’s also delicious straight from the fridge if you like a cool spoonful.
There’s so much comfort in a jar of freshly made stovetop apple pie filling with brown sugar—warm, soft, slightly spiced, with apples still holding their own. Every bite promises the taste of home, even if you never actually make a pie. Whether you tuck it under a crumb topping, swirl it in yogurt, or sneak it as a midnight snack, there’s always a good reason to keep some around. So grab those apples and get the saucepan ready. Your kitchen is about to smell like magic.
More Tasty Ideas
- Green Velvet Cupcakes with Cream Cheese Frosting: These sweet treats combine rich flavors that make for a perfect dessert option alongside your apple pie filling.
- Vanilla Bean St Patrick’s Day Cookies: Delightfully soft cookies infused with vanilla bean, ideal for serving with that apple pie filling or on their own.
- Crispy Irish Bacon Potato Skillet: This savory dish balances your dessert choices perfectly, making it a hit for brunch gatherings or family meals.
The Best Easy Stovetop Apple Pie Filling with Brown Sugar
Ingredients
Equipment
Method
- Combine the sliced apples, brown sugar, granulated sugar, cornstarch, lemon juice, cinnamon, nutmeg, allspice, and salt in a large saucepan. Toss gently to coat the apples evenly.
- Add the water to the saucepan.
- Place the saucepan over medium heat. Cook, stirring frequently, until the mixture thickens and begins to bubble. This usually takes about 10 minutes.
- Once the mixture is thick and glossy, reduce the heat to low. Stir in the butter until it melts completely.
- Remove the filling from the heat. The filling will thicken more as it cools.
- Use immediately in your favorite pie crust or allow it to cool completely before storing.