There’s something almost magical about the moment a batch of cinnamon rock candy shatters beneath the tap of a knife—fragrant shards scattering across the kitchen counter, gleaming ruby-red in the sunlight. The kitchen fills instantly with that unmistakable sweet, spicy perfume of cinnamon, and if you’re anything like me, it takes you right back to winters as a kid, when that first fiery crunch made your eyes widen and your cheeks flush. Cinnamon rock candy is one of those old-fashioned treats that manages to be simple and spectacular at the same time, with vibrant color, snapping crunch, and a slow-building heat that’s utterly nostalgic—especially around holidays, or whenever you want to add a burst of cheerful red to your candy jar.
What Makes This Cinnamon Rock Candy So Irresistible
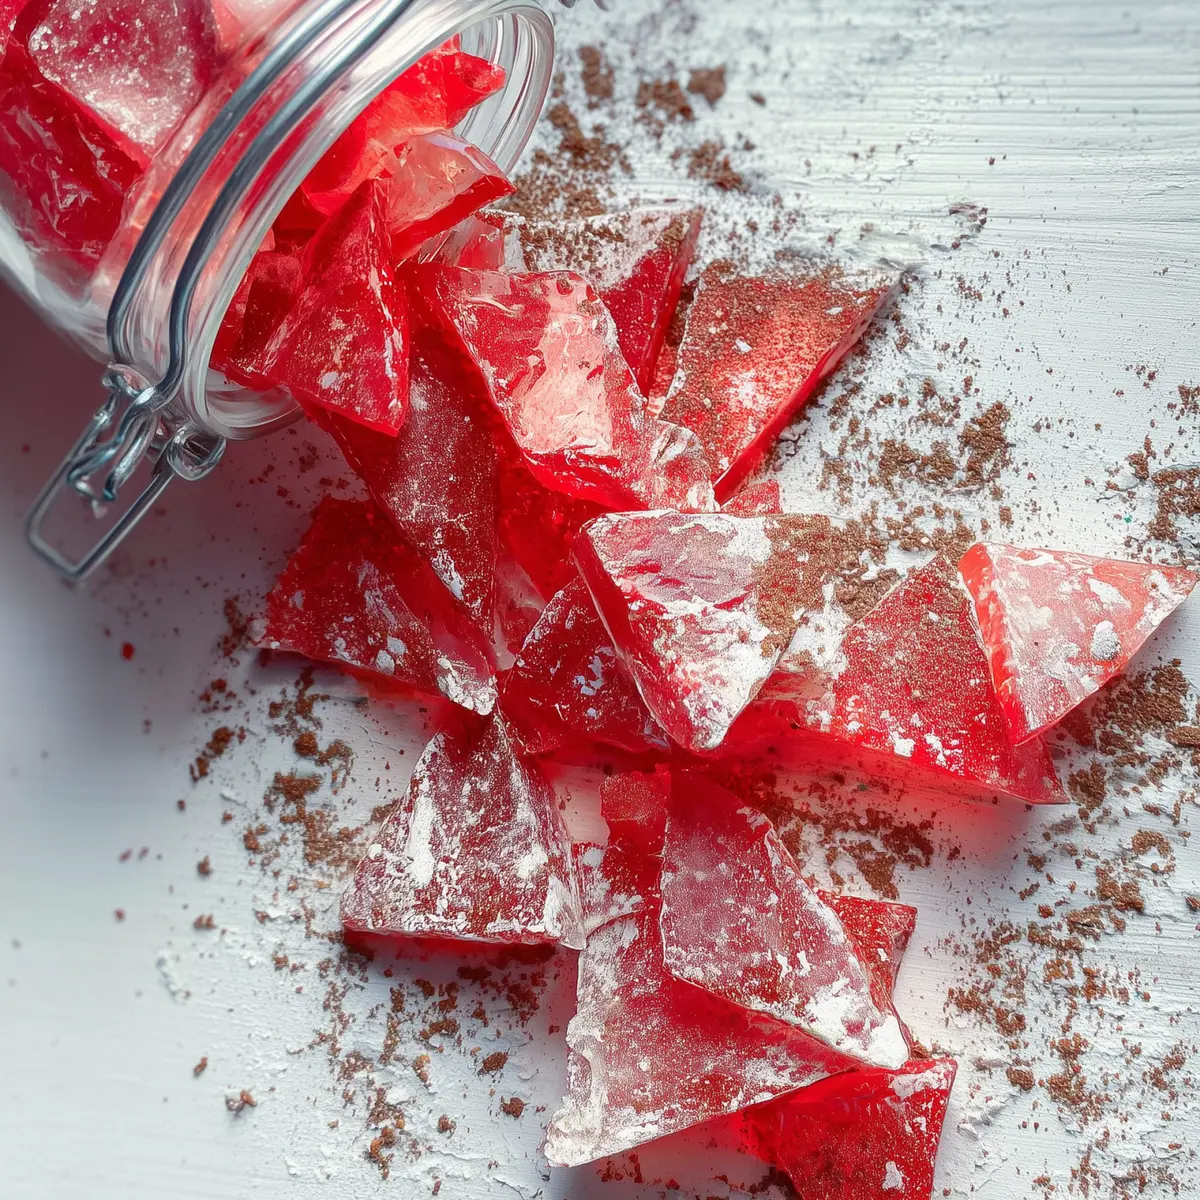
Maybe it’s the vivid, jewel-tone red or the way the spicy-sweet aroma of cinnamon hangs in the air, but cinnamon rock candy is undeniably captivating. Every batch carries the drama of sugar transforming from liquid to glassy sheets, infused with cinnamon oil that delivers both sweetness and heat in a single bite. There’s a lovely textural contrast, too—the initial hard crunch fades to a slow melt, just as the warmth from the cinnamon starts blooming across your tongue. I love making a tray for holiday gifting, but honestly, it’s a treat you’ll catch yourself craving at any time of year. Grab a few pieces to satisfy a sweet tooth, or pile them into a jar for a colorful centerpiece at gatherings. Either way, this candy brings instant nostalgia and plenty of sparkle to your table.
The Ingredients That Make Cinnamon Rock Candy Shine
You don’t need an overflowing pantry to make unforgettable cinnamon rock candy. Each ingredient plays its part:
- sugar – forms the crisp foundation of the candy, creating that signature glassy snap.
- Light corn syrup – helps keep the sugar from crystallizing too soon, so every bite ends up smooth and glossy.
- Water – blends everything at the start, dissolving sugar and getting the whole mixture bubbling together.
- Red food coloring – adds a bold, festive color; you can adjust for lighter or darker shades.
- Cinnamon candy oil – delivers that signature spicy kick; feel free to add a little extra if you want more heat.
- Powdered sugar – gives the broken candy pieces a soft, snowy finish and keeps them from sticking in the jar.
See the recipe card below for the full list of ingredients and measurements.
Bringing Cinnamon Rock Candy to Life in Your Own Kitchen
Homemade cinnamon rock candy might sound a little mysterious, but once you’ve done it once you’ll see how simple (and even a bit addictive) the process can be. Here’s how it’s done, step by step—from prepping your pan to snapping those glossy candies apart:
- Generously butter a rimmed metal baking sheet, then line it with parchment and butter the parchment, too. This helps prevent any sticky mess or unwanted sticking to either surface.
- Combine water, sugar, corn syrup, and your red food coloring in a large, deep saucepan. Stir gently over medium-high heat until the sugar starts to dissolve into the liquid—watch as it becomes smooth and vivid in color.
- Attach your candy thermometer to the side, making sure it doesn’t touch the bottom of the pan. Bring the mixture to a rapid boil and let it cook, keeping an eye on that thermometer; you want it to reach the hard crack stage—around 150°C. This usually takes about 20 minutes, but watch closely in case the bubbles start to climb the edges of your pan.
- As soon as you hit the right temperature, remove the pan from the heat. Working quickly and carefully (that cinnamon oil has a serious punch), stir in the cinnamon oil. Once it’s blended in, pour the whole mixture right onto your prepped sheet pan.
- Let it cool, undisturbed, for at least 4 hours. You’ll know it’s ready when the candy is glassy and fully set.
- Once cool, dust the candy slab with powdered sugar to prevent sticking. Flip it out onto another sheet or cutting board, peel off the parchment, and then use the tip of a sharp knife to break it into bite-sized, uneven shards—those jagged edges are half the charm.
- Finish with another dusting of powdered sugar before transferring everything to an airtight container to keep it crisp and fresh.
Getting That Perfect Candy Crunch and Cinnamon Heat
The best cinnamon rock candy hits you twice: a clean, glass-like snap under your teeth, followed by a slow wave of cinnamon warmth blooming on your palate. Temperature is everything here. Be patient as the mixture boils—aiming for the hard crack stage ensures the candy will shatter, not bend. If you’re new to the candy thermometer, stay close and resist the urge to stir too much once the sugar has dissolved. When it comes to flavor, the cinnamon oil is potent: start with a smaller splash if you like gentle spice, or double up for a bold, fiery finish that lingers just a second longer. And don’t skip the final powdered sugar dusting—it’s more than just pretty; it tames any stickiness so every shard stays crisp.
Tips, Variations, and Serving Ideas for Cinnamon Rock Candy
If you’ve ever made homemade candies before, you know all it takes is a little patience and the right strategy. Here’s what I’ve learned making cinnamon rock candy over the years:
- Always use parchment and plenty of butter along the bottom and edges of your pan to keep cleanup (and candy removal) breezy.
- If you prefer a different color, swap in other food colorings—just keep things bold and bright for maximum impact.
- For a milder flavor, dial back the cinnamon oil or experiment with flavorings like clove or anise for a fun twist.
- Store your finished candy in airtight containers at room temperature; moisture makes hard candy sticky, so keep it dry.
- For a festive gift, fill small jars or bags with broken pieces and tie them up with a bit of ribbon—these candies shine on a holiday cookie tray or as a thoughtful homemade treat tucked into a friend’s lunch bag.
Serve cinnamon rock candy as a sweet finish to a holiday meal, scatter pieces over ice cream for extra crunch, or simply nibble a shard after your afternoon coffee. However you share it, this candy brings warmth and nostalgia in every bite.
FAQs about Cinnamon Rock Candy
Can I substitute cinnamon extract for cinnamon oil in cinnamon rock candy?
Cinnamon oil has a much more intense heat and flavor than extract, so it’s the preferred choice for rock candy. If you can only find extract, your candy may have a milder flavor, and you might need to use a little more. Be aware that extract can sometimes leave the candy with a less vibrant taste.
How should I store leftover cinnamon rock candy to keep it from getting sticky?
Once your cinnamon rock candy is fully cool and dusted with powdered sugar, transfer it to an airtight container and keep it at room temperature. Humidity makes the candy sticky, so avoid storing it in the fridge and keep it away from direct sunlight or heat.
Can I freeze cinnamon rock candy for later?
Freezing isn’t recommended, as the texture of hard candy can change with moisture from the freezer. It’s best to make and store cinnamon rock candy in a sealed jar or tin at cool room temperature, where it’ll keep its snappy crunch for weeks.
Is it possible to make cinnamon rock candy ahead of time for gifting?
Absolutely! Cinnamon rock candy is a great make-ahead treat. Just be sure it’s completely cool and broken into pieces before storing. It stays fresh for several weeks when kept dry, so you can prep for holidays or special occasions without stress.
What’s the best way to serve cinnamon rock candy at parties?
For gatherings, I like to arrange broken shards in clear jars or on a platter so everyone can grab a few pieces. It also looks beautiful mixed with other hard candies or nestled among cookies on a dessert board. The spicy-sweet flavor makes it a standout edible decoration or festive snack.
After you’ve made a batch of cinnamon rock candy, you’ll understand why this nostalgic treat never goes out of style. Each shimmering, spicy shard is a little celebration of color, crunch, and just the right amount of warmth—the kind of candy you’ll find yourself reaching for, sharing, and savoring, again and again.
More Delicious Recipes
- St. Patrick’s Day Chocolate Guinness Bundt Cake with Stout Glaze: This decadent cake offers a rich flavor and shiny glaze, great for festive occasions like holidays.
- St. Patrick’s Day Brownie Trifle: Layers of brownies and creamy filling make this dessert a delightful treat, perfect for gatherings.
- Vanilla Bean St. Patrick’s Day Cookies: These cookies can be a sweet addition to any celebration, echoing the warm flavors of cinnamon rock candy.
Cinnamon Rock Candy
Ingredients
Equipment
Method
- Butter the bottom and the sides of a 15-inch x 10-inch x 1-inch rimmed metal sheet pan. Then line with parchment paper, and butter the parchment paper all the way to the edges to prevent the candy from seeping underneath and sticking.
- Over medium-high heat, in a large deep pan mix water, sugar, corn syrup, and food coloring until the sugar begins to dissolve. Use a candy thermometer attached to the side of the pan to get an accurate temperature. (take care not to let the thermometer touch the bottom of the pan)
- Boil until the sugar mixture reaches 300 degrees (hard crack stage) This should take about 20 minutes. Make sure to watch it closely. If the mixture begins to boil too close to the edge of the pan, remove it from the heat, give it a stir, and when the bubbles calm down, return it to the heat.
- Once the mixture reaches 300 degrees (or a little over) remove from heat and stir in the cinnamon oil, working quickly. Try to keep your face away from the hot mixture as it is strong, Make sure to work in a well-ventilated area. Pour the candy into the prepared sheet pan immediately. Then allow it to cool for 4 hours.
- After 4 hours dust the top of the candy with powdered sugar. Next, flip candy over onto a cutting board or another cookie sheet, and remove parchment paper. Return candy back to the original cookie sheet, and use the tip of a sharp knife to break the candy into bite-size pieces.
- Dust with more powdered sugar and store in an airtight container.