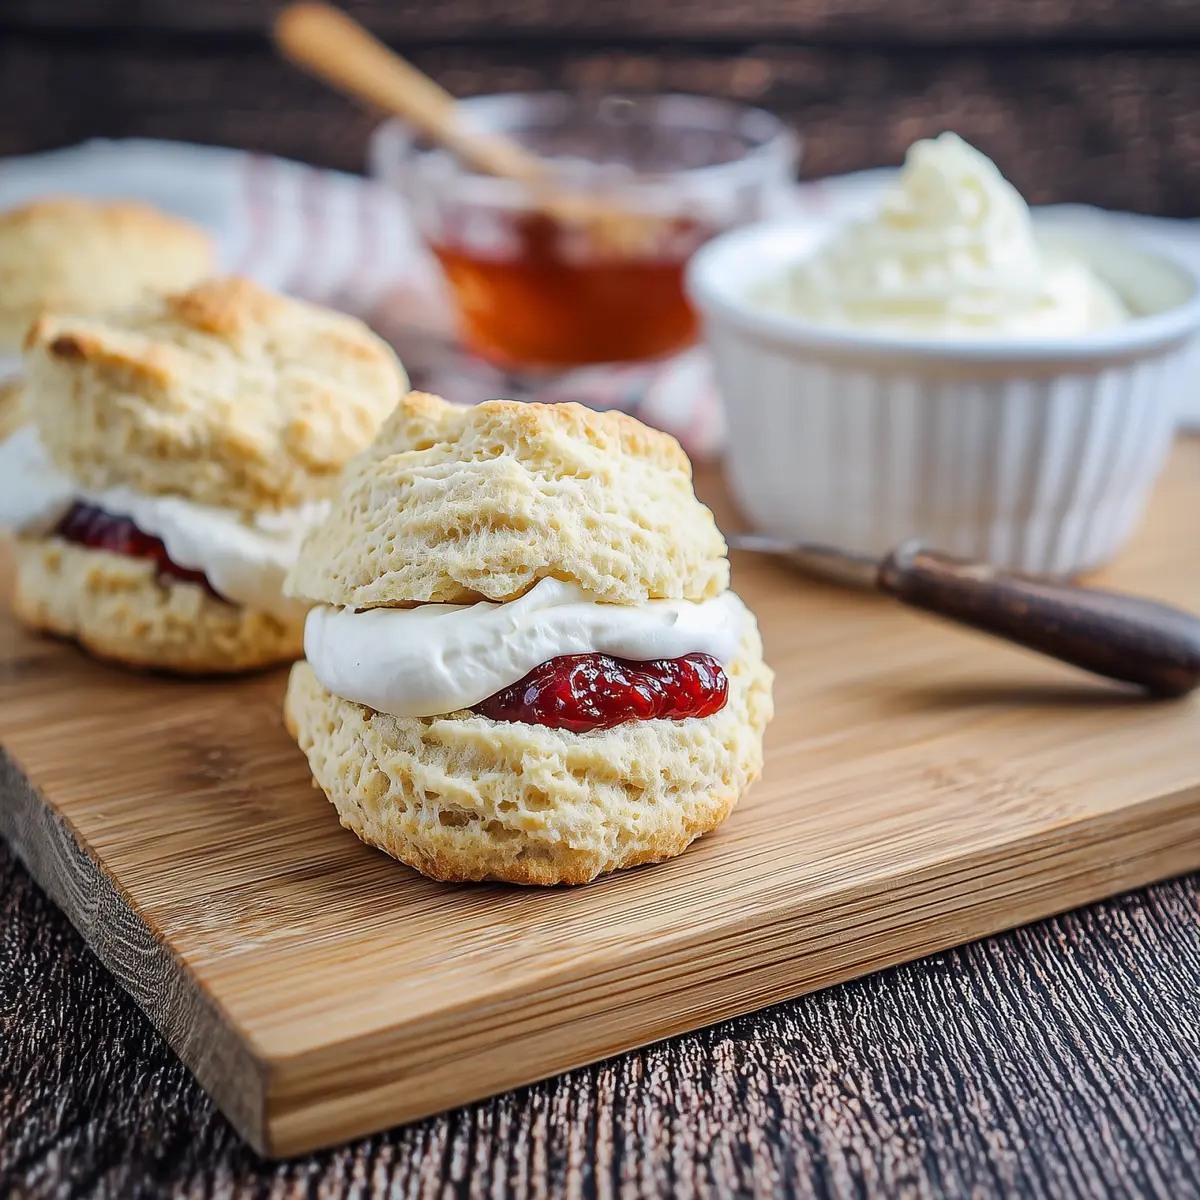
If you’ve ever found yourself craving something warm, buttery, and utterly simple to bake on a rainy afternoon, Irish Scones are exactly what you need. They’re cozy, soft, and just the thing for a slow morning or a snack break that feels a touch indulgent but never fussy. The aroma of these scones as they bake—sweet, rich, and lightly toasted at the edges—feels like an instant invitation to pause whatever you’re doing and make a pot of tea.
What I love about these scones is how you can whip them up with pantry basics, and they taste like a treat you’d get in a bustling Dublin café. The instructions are straightforward, so even if you don’t bake often, you’ll be rewarded with golden-topped, crumbly-soft scones ready for your favorite jam or a slather of fresh butter. If you’re after an easy recipe that captures a bit of Ireland’s charm in every bite, you’re absolutely in the right place.
Why These Irish Scones Work Anywhere
If you need a quick bake for unexpected guests, a family breakfast, or just a solo treat, Irish Scones really pull their weight. They only require simple ingredients but deliver layers of tender crumbs and rich, buttery flavor. That crumbly exterior and soft interior guarantee you get the best of both worlds—something hearty to hold in your hand, but delicate enough to melt in your mouth.
Another bonus is that you can enjoy these scones totally plain or dress them up. Maybe you’ll add a dollop of your favorite jam, a spoon of clotted cream, or a generous swipe of salted butter. They’re flexible without losing what makes them so comforting: the taste of home-baked goodness with very little effort.
What Goes Into Classic Irish Scones
- Flour: forms the structure—light, fluffy, and perfect for scones.
- Granulated sugar: just enough sweetness to balance the richness, but not so much to make these overly dessert-like.
- Baking powder: gives your scones a gentle lift and helps create that signature rise.
- Salt: lets all the flavors shine and balances the taste.
- Unsalted butter: the hero here, bringing flakiness and that deep, rich aroma.
- Egg: helps bind everything together and adds a touch more tenderness.
- Buttermilk: creates a slightly tangy note and keeps the dough moist.
See the recipe card below for the full list of ingredients and measurements.
Trying a Twist: Ingredient Swaps for Irish Scones
If you’re out of buttermilk, go ahead and stir a bit of lemon juice or vinegar into plain milk—it’ll give you a similar tang and texture. No unsalted butter? Salted works, but just be mindful of the total salt content. If you want your scones to be a touch sweeter, swap in a sprinkle of vanilla sugar or toss in a handful of dried fruit for a treat that leans toward the afternoon tea style.
For a dairy-free spin, non-dairy butter and a plant milk plus a splash of acid can stand in for the originals. Just know you may get a slightly different crumb, but still a lovely, bake-shop-worthy outcome. Classic scones are famously forgiving, so don’t fret if you need to improvise.
Golden Bakes the Easy Way: Step-by-Step
- Start by heating your oven and lining your baking tray—no need for fancy tools, just parchment or a dusting of flour is plenty.
- Combine your dry ingredients in a roomy bowl. When you cut in the cold butter, work quickly—those chilly bits are what give scones their flake and tenderness. You’re aiming for a sandy, crumbly texture.
- In a small bowl, whisk your egg and most of your buttermilk. Pour this mixture into the dry stuff and use your hands or a wooden spoon to gently coax everything together. Be light! Overworking makes tough scones.
- If things are a bit dry, add a splash more buttermilk. The dough should just hold together—it won’t be totally smooth and that’s ideal.
- Turn it onto a floured countertop and gently pat it into a round that’s about as thick as a little finger. Cut out rounds using a cutter, reshaping leftovers gently to form more scones.
- Transfer the dough circles to your tray, brush the tops with extra buttermilk, and pop them into the oven. You’ll know they’re ready when they’ve turned a delicate golden brown on top and smell almost nutty from the butter.
Scone Success Secrets & More Buttery Goodness
A few easy tricks help you master Irish Scones every time. Start with cold butter, and don’t overmix once the liquid hits the dough. If you mix too much, you’ll end up with dense scones instead of those pillow-soft centers.
Use a sharp cutter (never twist as you cut) for the best rise. If you’re making scones ahead, freeze the unbaked dough circles. Bake them straight from frozen—they may need a couple more minutes but will rise just as beautifully.
To store, keep fresh scones in an airtight tin at room temperature for a day or two. You can pop leftovers in the oven for a few minutes to refresh that fresh-baked aroma and soften any dryness.
Serve, Savor, and Make It Your Own
Irish Scones slide perfectly into both breakfast and afternoon tea. Try them hot with strawberry jam, or for something indulgent, split a scone and pile it with whipped cream and preserves. These work well with a mug of strong black tea or coffee, but they’re just as lovely with cocoa for a midday pick-me-up.
Feeling creative? Add citrus zest to the dough for a pop of brightness or stir in currants for a nod to traditional Irish bakery style. You can even freeze finished scones for quick treats later—just thaw and rewarm to recapture that just-baked magic.
FAQs about Irish Scones
What’s the main difference between Irish Scones and British scones?
Irish Scones tend to be a little less sweet and a bit denser than British scones. They often lean into a heartier, crumb-focused texture and are usually served simply with butter and homemade jam.
Can I make Irish Scones ahead of time?
Yes, you can make and freeze the unbaked scone dough. Bake straight from the freezer—just give them a couple of extra minutes in the oven for perfect golden tops.
How do I keep scones soft after baking?
To keep your scones soft, store them in an airtight container after they cool. If they dry out, a brief reheat in the oven brings back moisture and flakiness.
Are Irish Scones supposed to be served warm?
Irish Scones are best enjoyed warm, either fresh from the oven or gently reheated. The warmth enhances their buttery flavor and makes the crumb extra inviting.
Final Thoughts on Irish Scones
Homemade Irish Scones don’t ask much from you—just a handful of familiar ingredients, a little time, and a gentle touch. Their rustic, no-fuss charm reminds you that the best bakes come from simplicity.
Next time you want a taste of comfort, try these scones. They’re the kind of treat you’ll look forward to making again and again, bringing a bit of Irish warmth right into your kitchen.
More Delicious Recipes
- St. Patrick’s Day Snack Board: This festive board offers a variety of delicious bites that pair perfectly with your homemade Irish Scones.
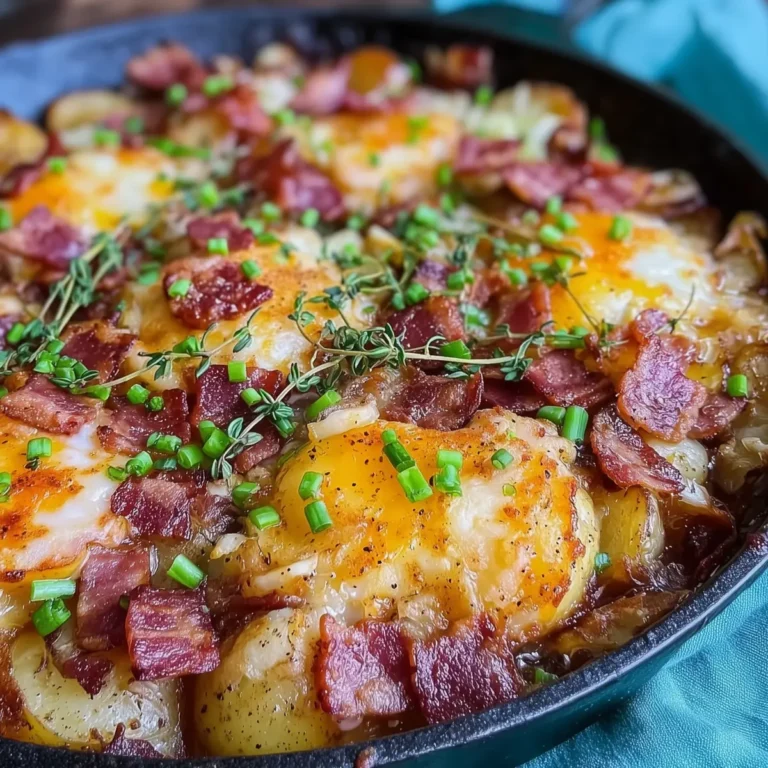
- Crispy Irish Bacon Potato Skillet: Enjoy a hearty breakfast option that complements the light sweetness of scones beautifully.
- St. Patrick’s Day Chocolate Guinness Bundt Cake with Stout Glaze: A rich dessert that captures the essence of Irish baking and makes a great pairing with scones for a special occasion.
Irish Scones
Ingredients
Equipment
Method
- Preheat oven to 400˚F (200˚C). Line a large baking sheet with parchment or lightly flour.
- In a large bowl, combine the flour, sugar, baking powder, and salt.
- Cut in the cold butter using a dough blade, forks, or your fingers until texture becomes coarse and no pieces are larger than a pea.
- In a small bowl, beat together egg and 3/4 cup (177 milliliters) buttermilk. Pour into the flour mixture and gently mix using your hands or a wooden spoon.
- Slowly add the remaining 1/4 cup (60 milliliters) buttermilk only as needed to bring the dough together.
- On a lightly floured surface, gently pat the dough into a circle about 1 inch (2.5 centimeters) thick.
- Use a 2 1/2 inch (6 centimeter) round or biscuit cutter to cut out circles of dough. Gently bring together the leftover scraps of dough to cut out more circles.
- Transfer to prepared baking sheet. Brush the tops with additional buttermilk.
- Bake in preheated oven until golden, 15-20 minutes.