The bright, cool scent of peppermint always makes me think of early spring, when winter’s chill still lingers but you’re ready for fresh flavors and a splash of color. Baking a batch of St. Patrick’s Day Mint Blossom Cookies is like sending out an invite for good cheer—the kitchen fills with buttery warmth, that crisp green sparkle, and just the right hint of dark chocolate to round it all out. These cookies are irresistible for any March celebration, but honestly, I make them whenever I’m craving that magical combo of fresh mint and deep cocoa. Each bite is soft, sweet, and just a little bit unexpected, with the promise of spring at the center.
What makes these St. Patrick’s Day Mint Blossom Cookies so memorable
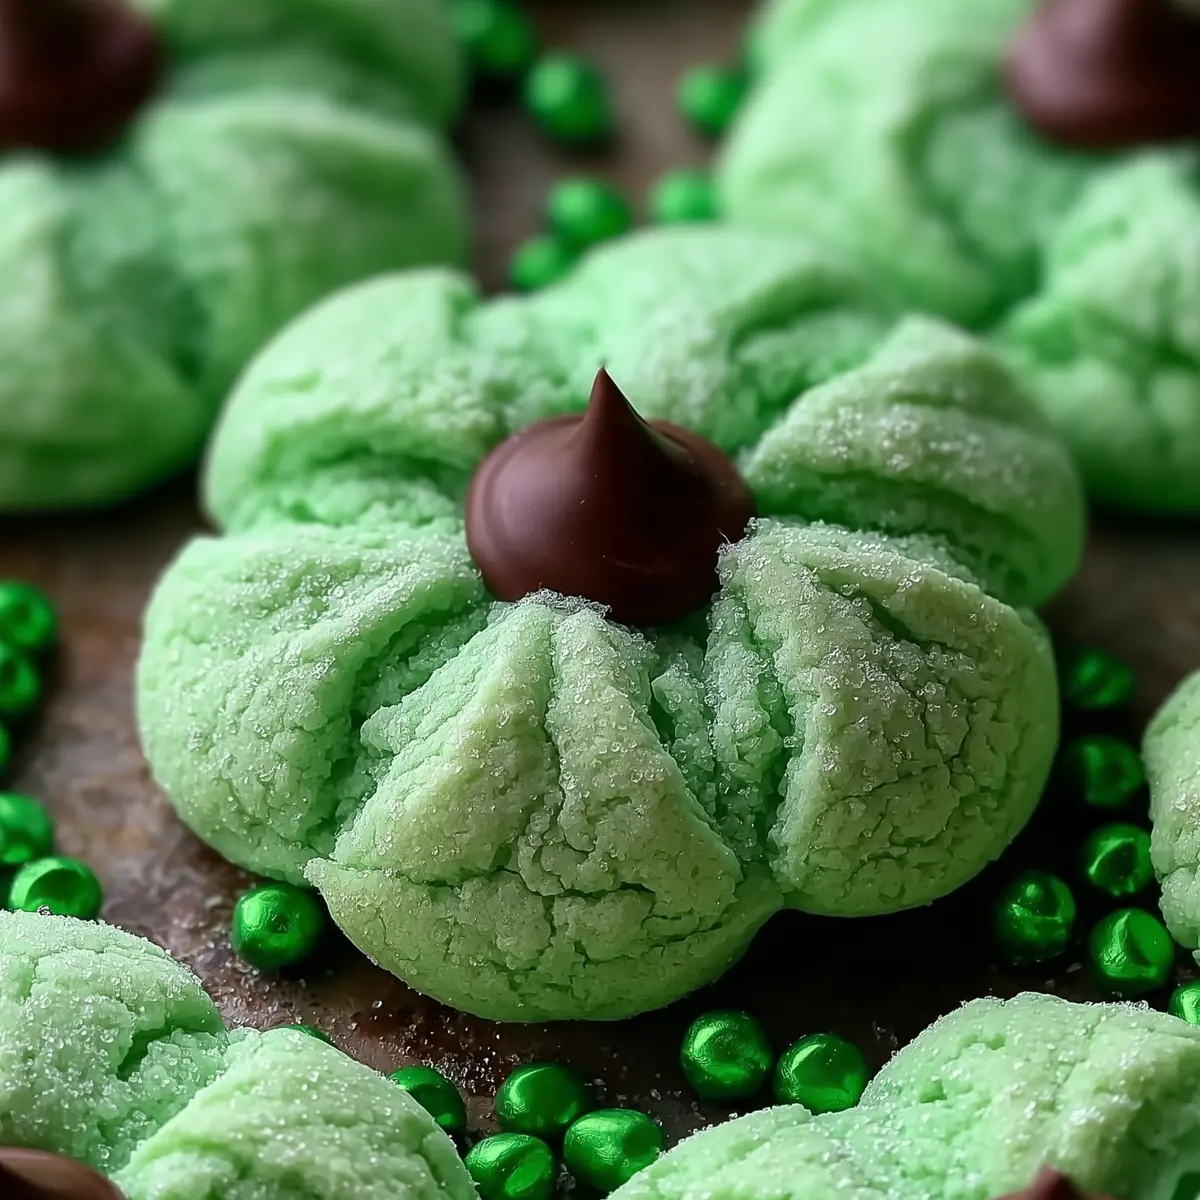
It’s impossible to resist the playful look and uplifting bite of these cookies. They’re the dessert equivalent of a four-leaf clover: soft sugar cookie underneath, emerald sparkles all over, and that signature dark chocolate “kiss” right in the middle. The peppermint flavor is fresh but never overpowering, blending with the buttery dough to create a smooth, melt-in-your-mouth texture. Every time I make these for a party or classroom treat, there’s a little flurry around the cookie tray—they’re just so inviting. These are perfect for any gathering where you want to offer a bite-sized, cheerful treat that feels made for the season.
The ingredients that give St. Patrick’s Day Mint Blossom Cookies their festive flavor
- Flour – creates the structure for these thick, tender cookies, giving just the right chew without heaviness.
- Baking soda and baking powder – together, they help the cookies stay soft and puff up slightly for that classic blossom look.
- Fine sea salt – enhances every other flavor in the dough (don’t skip it).
- Unsalted butter – brings luxurious richness and helps the cookies bake up golden and soft.
- Granulated sugar + light brown sugar – this blend makes for a cookie that’s sweet with a whisper of caramel warmth.
- Eggs – promise structure, tenderness, and just enough lift.
- Peppermint extract – delivers that signature minty freshness, not at all toothpaste-y, just bright and clean.
- Vanilla extract – softens the mint, rounding everything out like a warm undertone.
- Green gel food coloring (optional) – turns your cookies into showstoppers, but you can leave it out for a natural look.
- Granulated sugar (for rolling) – helps the colored sugar stick and adds sparkle.
- Green sanding or colored sugar – brings on the festive St. Patrick’s Day vibe with every emerald-dusted bite.
- Dark chocolate kisses or chocolate candies – the grand finale, marrying mint and chocolate in every mouthful.
See the recipe card below for the full list of ingredients and measurements.
Bringing these mint blossom cookies to life, step by step
Whether you make these on the morning of St. Patrick’s Day or ahead of time, the process is deeply satisfying—especially when the house starts to smell like a crisp spring morning.
- Start by whisking your dry ingredients—flour, leaveners, and salt—together in a bowl. This step ensures every cookie bakes up with the perfect crumb, so don’t rush it.
- Cream the butter until smooth, then beat in the sugars until the mixture is fluffy and pale. This is where the dough gets its tender, almost creamy base.
- Mix in the eggs, one at a time, followed by peppermint and vanilla extracts. If you’re using green food coloring, blend it in now until the shade is just right for your celebration.
- Add the dry ingredients gradually, mixing just until the dough pulls together—don’t overwork it or you’ll lose that soft, cake-like quality.
- Cover and chill the dough for at least half an hour. It may be the hardest part, but chilling keeps the cookies from spreading and gives that satisfyingly thick texture.
- Once chilled, roll the dough into small balls, then tumble each one in green colored sugar until coated from every side.
- Bake on a lined tray until the edges are set and tops are ever-so-slightly golden. Keep an eye out—mint cookies can overbake quickly.
- Fresh from the oven, let the cookies rest just a couple of minutes before gently pressing a chocolate piece into the center. The chocolate will melt a little and stick without sinking in too far.
- Let the cookies cool completely before stacking or storing. Patience pays off here, as this allows the chocolate to set and the flavors to mingle like old friends.
Achieving the perfect balance of mint, sweetness, and chocolate
There’s a sweet spot when it comes to mint: just enough for that lively, fresh taste, but never so much that it feels overpowering. The peppermint in these St. Patrick’s Day Mint Blossom Cookies lifts the buttery dough, and the pinch of salt draws out both the chocolate and the mint. Chilling the dough is non-negotiable for the best texture—don’t skip it. As for the chocolate, a dark chocolate kiss or a high-quality dark chocolate drop really makes these cookies shine. If you’re tempted to tweak, try adding a pinch more salt or swapping in a semi-sweet chocolate, but don’t go too sweet—let the mint and chocolate remain the stars.
Tips for St. Patrick’s Day Mint Blossom Cookies: Variations, storage, and serving
If you want to get playful, try rolling the cookies in a blend of green and gold sanding sugars for a little sparkle. Not a big chocolate fan? White chocolate drops or even mint chocolates work beautifully for a different twist. For those avoiding food coloring, the cookies are just as tasty left pale, with green sugar adding plenty of festive color. Store cooled cookies in an airtight container at room temperature, and they’ll stay soft for several days. You can also freeze unbaked dough balls (without sugar coating) for up to a month—just thaw, roll in sugar, and bake fresh. These are adorable tucked into lunch boxes, stacked on dessert platters, or enjoyed with a cup of fresh coffee after a brisk March walk.
FAQs about St. Patrick’s Day Mint Blossom Cookies
Can I use mint extract instead of peppermint extract in these cookies?
You can use mint extract, but the flavor will be a bit different—mint extract is often a mix of spearmint and peppermint. Peppermint gives a cleaner, sharper taste that balances best with chocolate.
Do St. Patrick’s Day Mint Blossom Cookies freeze well?
Absolutely! These cookies freeze beautifully after baking. Let them cool completely, then store them in a freezer-safe container. Simply thaw at room temperature for a few hours before serving.
Can I make St. Patrick’s Day Mint Blossom Cookies ahead of time?
Yes, you can prepare the dough a day or two before baking. Keep it well-wrapped in the fridge, then shape, roll in sugar, and bake when ready. You can also bake the cookies and store them in an airtight container until your event.
What’s a good substitute for chocolate kisses if I don’t have any?
Any small piece of dark or semi-sweet chocolate works well as a topper. Even a square of dark chocolate, broken into segments, will achieve the same lovely melt and look.
How long will these cookies stay fresh after baking?
St. Patrick’s Day Mint Blossom Cookies stay soft and flavorful for up to five days when stored in a sealed container at room temperature. For longer storage, use the freezer method to keep them at their best.
There’s something special about welcoming spring with a tray of St. Patrick’s Day Mint Blossom Cookies—each one is a little celebration of color, flavor, and nostalgia. When you take that first bite through the crisp sugar crust, then hit the soft minty center and dark chocolate, it’s the kind of small joy you want to share. Whether you set them out at your St. Paddy’s Day gathering or just bake a batch to chase away the gray, these cookies are the perfect little excuse to savor the season.
St. Patrick's Day Mint Blossom Cookies
Ingredients
Method
- Whisk together flour, baking soda, baking powder, and salt in a medium bowl. Set aside.
- Cream butter until smooth, then add granulated sugar and brown sugar. Beat until light and fluffy.
- Add eggs one at a time, mixing well after each. Add peppermint extract and vanilla extract and mix briefly.
- If using, mix in green gel food coloring until evenly tinted.
- Gradually add dry ingredients to wet ingredients, mixing just until combined.
- Cover dough and refrigerate for at least 30 minutes to prevent spreading.
- Roll dough into 1-tablespoon balls and roll in green sugar until fully coated.
- Bake at 350°F (175°C) for 9–11 minutes until edges are set and lightly golden.
- Let cookies cool on the baking sheet for 2–3 minutes, then press one chocolate piece into the center of each cookie.
- Allow cookies to cool completely before transferring or storing.