Some days, you can’t help but crave flakiness—the kind that crumbles in your hands and gives way to sweet, juicy berries with each bite. That’s exactly what happens the moment you break into a batch of fresh Berry Turnovers. There’s no need for complicated pastry dough or special skills, just a bit of patience, cold butter, and the joy of tucking ripe, colorful berries into homemade layers.
Making your own turnovers might sound like a bakery project, but trust me, once you see those golden pockets bubbling and aromatic on a tray out of your own oven, you’ll wonder why you ever settled for store-bought.

What Makes These Berry Turnovers Irresistible
Berry Turnovers have that magical way of stealing the spotlight whether you’re serving weekend brunch, packing a picnic basket, or looking for a handheld dessert that disappears faster than you can say “save me another.” It all starts with a shortcut rough puff pastry—a dough that’s easier than traditional puff yet delivers incredible flaky layers.Each little triangle is stuffed with just enough fruity filling to burst with berry flavor, but not so much it overwhelms those buttery layers. The outside bakes up golden and crisp while the inside holds a tender, jewel-toned surprise. The combination hits all the right notes: sweet, tart, crunchy, and soft. It’s the sort of baking project that leaves your kitchen smelling like a summer morning, even if you’re pulling them from the oven on a cool day.
If you want a treat that feels like something from your favorite bakery but is absolutely do-able at home, Berry Turnovers are the ticket.
Ingredient Insights for Berry Turnovers
To get those shatteringly crisp layers and juicy pockets of filling, it’s all about balance and freshness. Here are the key ingredients that make Berry Turnovers sing:- Cornstarch – Helps thicken the berry filling, so you don’t end up with a soggy pastry.
- Warm water – Dissolves the cornstarch and helps start the filling.
- Mixed berries – The stars of the show. Blueberries, blackberries, and strawberries each bring a different tang, color, and sweetness.
- Granulated sugar – Just enough to balance the tartness of the berries and also lightly sweeten the dough.
- Lemon juice – Adds brightness and keeps the filling tasting fresh, never flat.
- All-purpose flour – The backbone of your pastry. Keep extra handy for dusting surfaces and hands.
- Salt – Essential for flavor, don’t skip this in the dough.
- Unsalted butter, very cold and cubed – This is crucial! Cold butter makes all the flaky magic happen in your pastry layers.
- Ice cold water – Hydrates the dough without warming the butter—keep it seriously cold for best results.
- Large egg – Whisked with milk for a shiny, bronzed finish on those bakery-worthy tops.
- Milk – Mixed with egg for the egg wash, giving your turnovers their classic golden look.
- Coarse sugar (optional) – Adds extra crunch and sparkle on top before baking.
- Vanilla icing (optional) – For drizzling over the cooled turnovers, bringing an extra hint of sweetness.
See the recipe card below for the full list of ingredients and measurements.
How to Make Flaky Berry Turnovers at Home
Creating Berry Turnovers from scratch is more approachable than you might think. Here’s how to do it, step by step:- Whisk together cornstarch and warm water until smooth. In a small saucepan over medium heat, combine the berries, granulated sugar, cornstarch mixture, and lemon juice. Stir as it cooks, breaking up some berries, until the mixture simmers and thickens. Remove from the heat and let it cool completely—the filling will get thicker as it sets.
- In a large bowl, whisk together the flour, sugar, and salt. Add the cubed cold butter. Gently toss, then rub the butter into the flour using your hands, keeping some chunks intact. The key is to keep the butter cold and avoid overworking it.
- Add ice cold water gradually, tossing with your hands after each addition, until the dough forms a rough, shaggy clump. Squeeze the dough together as it hydrates, but don’t worry if it looks a bit messy—this is exactly what you want for a flaky result.
- Turn the dough onto a floured surface. Pat into a thick rectangle and fold it into thirds like a letter. Press and smooth any cracks, then wrap tightly and refrigerate to chill.
- Chill the dough well (at least a couple of hours) so those buttery pockets stay cold and ready for flaking.
- Once chilled, roll the dough into a rectangle, then fold into thirds. Turn and repeat the rolling and folding five more times (a rolling pin is super helpful here). This layering is the secret to those crisp, separate pastry sheets.
- Wrap and chill the dough again for a short rest. At this point, the dough can also be frozen if you need a break or want to prep ahead.
- Line two rimmed baking sheets with parchment or silicone liners—these will catch any buttery drips and help lift the turnovers off easily post-bake.
- Roll out the dough into a big square, then cut into smaller squares using a sharp knife or pizza cutter. Move the dough squares onto your baking sheets.
- Spoon a generous amount of cooled berry filling into the center of each square. Fold over to form triangles, and press the edges tightly with a fork to seal. If the dough gets sticky or too warm, give it a quick chill before crimping.
- Chill the shaped turnovers again before baking—this helps them hold their form and bake up extra flaky.
- Preheat your oven and whisk together the egg and milk for the egg wash. Brush over the pastries, then cut a few small slits in the tops for steam to escape. Sprinkle with coarse sugar if you want a crunchy finish.
- Bake until the turnovers are puffed, bronzed, and the edges are gloriously crisp. Don’t worry if you see a little butter bubble or filling seep out—it’s all part of the homemade charm.
- Let them cool for a few minutes so the filling sets and centers aren’t lava-hot. If you love extra sweetness, drizzle with vanilla icing once they’ve cooled down.
Troubleshooting and Texture Tips for Turnover Success
Turnovers are all about that irresistible contrast between crisp pastry and juicy, slightly gooey filling. Here’s how to get the best results (and avoid common pitfalls):- Keep everything cold: The colder your butter and dough, the flakier your pastry. If you notice the butter melting or dough feeling sticky, pop it in the fridge for a quick fix.
- Seal the edges well: Press the fork firmly around the edges so filling won’t sneak out during baking.
- Don’t overfill: Too much filling makes turnovers hard to seal and invites leaks. A generous spoonful is just right.
- Look for golden brown color: Take the turnovers out when they’re deeply golden. Pale pastry means it’s underbaked, which can make it chewy instead of crisp.
- Oven leaks are normal: Don’t panic if butter bubbles onto the tray. Sometimes, brushing leaking butter back over the pastry halfway through baking boosts the crunch factor.
- Egg wash for shine: This gives you those glowing bakery-style tops, especially if you like a sprinkle of coarse sugar, too.
Creative Variations and Serving Ideas
Once you have your basic Berry Turnovers down, there’s plenty of delicious room to play:Add a pinch of cinnamon to the berry filling for cozy warmth, or swap in raspberries or cherries for a new flavor twist. You might even want to tuck a square of dark chocolate alongside the berries for a dessert version with extra indulgence.
Berry Turnovers are perfect with morning coffee, a scoop of vanilla ice cream, or just a snow of powdered sugar. For brunch, they travel beautifully—no utensils needed. Stack them on a serving platter with a drizzle of vanilla icing, or serve them plain for a crisp, simple treat. They’re wonderful fresh from the oven, but easy to enjoy at room temperature, too.
Keeping Your Berry Turnovers Fresh
Berry Turnovers are at their peak the day they’re baked, with all that shattering crispness and juicy center. If you need to store extras, cover the cooled turnovers loosely at room temperature for a day, or tightly and keep in the refrigerator for up to five days.You can also freeze baked or unbaked turnovers—just thaw before baking or serving, and reheat briefly in the oven or microwave if you’d like to bring back a bit of that just-baked warmth. Iced or un-iced, they’re freezer-friendly for several months, making them a great make-ahead treat for spontaneous cravings or unexpected guests.
FAQs about Berry Turnovers
Can I use frozen berries in Berry Turnovers?
Yes, you can use frozen berries straight from the freezer for Berry Turnovers. Just add them to the saucepan as directed—no need to thaw. Keep in mind the filling may take slightly longer to thicken, and you may want to increase cornstarch slightly for extra juiciness.
How do I keep my Berry Turnover pastry flaky?
The best way to ensure flakiness is to keep your butter and water as cold as possible, and chill the dough whenever it gets soft. Avoid overworking the dough and make sure to let it rest between steps for the lamination to create distinct, crisp layers.
What should I do if the filling leaks out during baking?
It’s common for a little filling to seep during baking, even with careful crimping. To minimize leaks, be sure to seal the edges firmly with a fork and chill the turnovers before baking. Don’t add extra filling, as too much makes sealing tough.
Can I make Berry Turnovers ahead of time?
Absolutely! You can prepare and shape the turnovers ahead and refrigerate or freeze them before baking. Baked turnovers also freeze well—thaw and reheat as desired for a fresh-baked experience any time.
Savoring Every Layer of Berry Turnovers
Few things beat breaking into a warm, freshly baked Berry Turnover and seeing those beautiful, flaky layers reveal juicy, gem-like berries inside. Whether you’re baking for a gathering or a simple afternoon treat, these pastries are guaranteed to make you—and anyone else lucky enough to grab one—pause and savor. Enjoy them with a dusting of sugar or a drizzle of icing, and soak up those moments of bakery-level comfort right from your own kitchen.What To Try Next
If you enjoyed making berry turnovers, here are a few more tasty ideas to keep the sweetness going.
- Homemade Strawberry Sheet Pan Pop Tart — shares fresh berry flavors with a fun, flaky twist.
- Strawberry Danish — perfect for a cozy breakfast or brunch, just like your turnovers.
- Raspberry Chia Jam Thumbprint Cookies — offers a delightful contrast with a chewy cookie texture and tart jam.
Recommended Equipment

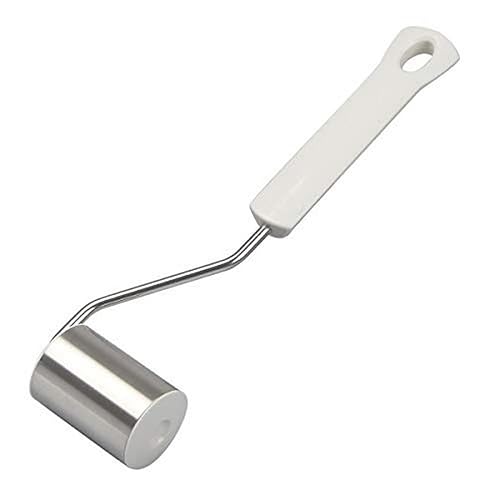

* As an Amazon Associate, I earn from qualifying purchases. There is no extra cost to you.

Homemade Berry Turnovers
Ingredients
Equipment
Method
- Whisk the cornstarch and water together until all the cornstarch has dissolved. (I just use a fork to mix–very easy.) Place the berries, sugar, cornstarch mixture, and lemon juice into a small saucepan over medium heat. Using a wooden spoon or rubber spatula, stir the mixture as it cooks. Break up some of the berries as you stir. Bring it to a simmer and allow to simmer for 3 minutes, stirring constantly. Remove pan from the heat and cool completely. The mixture will thicken as it cools. Once cool, filling can be covered and refrigerated for up to 5 days before using. Makes 3/4 cup of filling.
- Whisk the flour, sugar, and salt together in a large bowl. Place the cold and cubed butter on top. Gently toss the flour and butter together with your hands, and then briefly rub the butter into the flour to begin combining them, as you can see in the video tutorial below. You do not want to break down the butter too much in this step. This step is only possible if the butter is very cold because if the butter is warm, you’ll end up with paste. I do not recommend a food processor, pastry cutter, or mixer for this step because it will break down the butter too much.
- At this point, the butter is still in large cubes/chunks. Begin adding the ice cold water 1 Tablespoon (15ml) at a time until dough forms 1 large shaggy clump in your bowl. Use your hands to toss the mixture together after you add each Tablespoon. (I usually start with 2 Tablespoons (30ml) of water before I begin tossing together.) You can use a spatula or spoon for tossing, but I really do recommend your hands so you get a good feel of the dough. As the dough begins to hydrate after about 4 Tablespoons (60ml) of water, you can start lightly squeezing or clumping the dough together with your hands to help bring it together. Mixture will still be very shaggy, as you can see in the video and photos below. If your dough feels sticky and wet before adding 6 Tablespoons of water, your butter was likely too warm—you can continue with the recipe, but the dough will not be as flaky.
- Pour the shaggy clump of dough out onto a lightly floured work surface. There will still be large chunks of butter at this point and that’s a good thing. Begin patting the dough down with lightly floured hands until it’s 3/4 – 1 inch thick, about a 5×8 inch rectangle. Fold the dough into thirds as if you were folding a business letter. Use your hands to gently flatten and smooth out any cracks in your dough. Wrap it up tightly in plastic wrap, parchment paper, or aluminum foil, or place into any tightly sealed container.
- Refrigerate dough for at least 2 hours and up to 24 hours.
- Take the dough out of the refrigerator to begin the 'rolling and folding' process. If the dough chilled for longer than about 3 hours, it’s likely very stiff so let it rest for about 5 minutes before you begin rolling. Lightly flour a work surface. The dough gets sticky, so make sure you have more flour nearby as you roll and fold. Use your hands to gently flatten the dough into a small square. Using a rolling pin, roll the dough into a 6 inch wide and 12 inch tall rectangle that’s 1/2 inch thick. The exact dimensions are not important, but the thickness is. As you roll, it’s best to flip the dough over once or twice to make sure it’s not sticking to your work surface. Lightly flour your work surface as needed. Fold the rectangle into thirds as if it were a business letter. (See photos and video tutorial.) Turn it clockwise or counter clockwise and roll it out into a 6×12 inch 1/2 inch thick rectangle again. Then, fold into thirds again. Turn it clockwise or counter clockwise. You’ll repeat rolling and folding 4 more times for a total of 6 times.
- Wrap up/seal tightly and refrigerate for at least 15 minutes and up to 24 hours. You can also freeze the dough at this point. See freezing instructions.
- Line two large baking sheets with parchment paper or silicone baking mats. Rimmed baking sheets are best because butter may leak from the dough as it bakes. If you don’t have rimmed baking sheets, when it’s time to preheat the oven, place another baking sheet on the oven rack below to catch any butter that may drip.
- Take the dough out of the refrigerator to begin the shaping steps. Lightly flour a work surface. Using a rolling pin, roll dough into a 12-inch square. Using a pizza cutter or sharp knife, cut into 9 4-inch squares. Transfer squares to prepared baking sheets. (4 on one, 5 on the other.)
- Spoon 1 heaping Tablespoon of filling into the center of each square. Fold one corner over the filling to make a triangle. If some chunky filling has seeped out, use a fork to push it back in if you can. Using a fork, crimp the edges of the turnovers together to seal. If the dough has become too warm and sticky to crimp, refrigerate the triangles for 10 minutes. You want to make sure you have a tightly sealed turnover to help prevent filling from spilling out in the oven.
- Chill the shaped turnovers in the refrigerator, covered or uncovered, for at least 15 minutes and up to 1 hour (or freeze, see freezing instructions below). You can preheat the oven and make the egg wash (next steps) as they finish up chilling.
- Preheat oven to 400°F (204°C).
- Whisk the egg and milk together. Brush on each turnover. Cut 3 slits into the tops of each to allow steam to escape. If desired, sprinkle with coarse sugar.
- Bake for 22-25 minutes or until golden brown on top and around the edges. Some butter may leak from the dough, that’s completely normal and expected. Feel free to remove the baking sheets from the oven halfway through baking and brush the dough with any of the leaking butter, then place back in the oven to finish baking. (That’s what I do!)
- Remove baked turnovers from the oven. Cool for at least 5 minutes before icing/serving. Centers will be hot.
- Drizzle with vanilla icing if desired.
- Cover leftover iced or un-iced turnovers and store at room temperature for 1 day or in the refrigerator for up to 5 days. Or you can freeze them for up to 3 months. Thaw before serving. Before enjoying, feel free to reheat leftover iced or un-iced turnovers in the microwave for a few seconds until warmed.