Most mornings, I can resist the lure of something sweet, but if you set out a tray of homemade chocolate pop tarts, all bets are off. There’s just something unbeatable about crisp, buttery pastry wrapped around a gooey chocolate filling, finished with glossy icing and bright sprinkles. You make these once and you’ll honestly wonder why store-bought ever seemed enough.
Bringing a batch of homemade chocolate pop tarts out of the oven is pure kitchen delight—think rich cocoa aroma, flaky edges, and warm, melty middles that make the early wake-up totally worth it. Whether it’s weekend breakfast or a cozy treat for the lunch box, these tarts deliver in both taste and nostalgia.
Why Homemade Chocolate Pop Tarts Are a Game-Changer
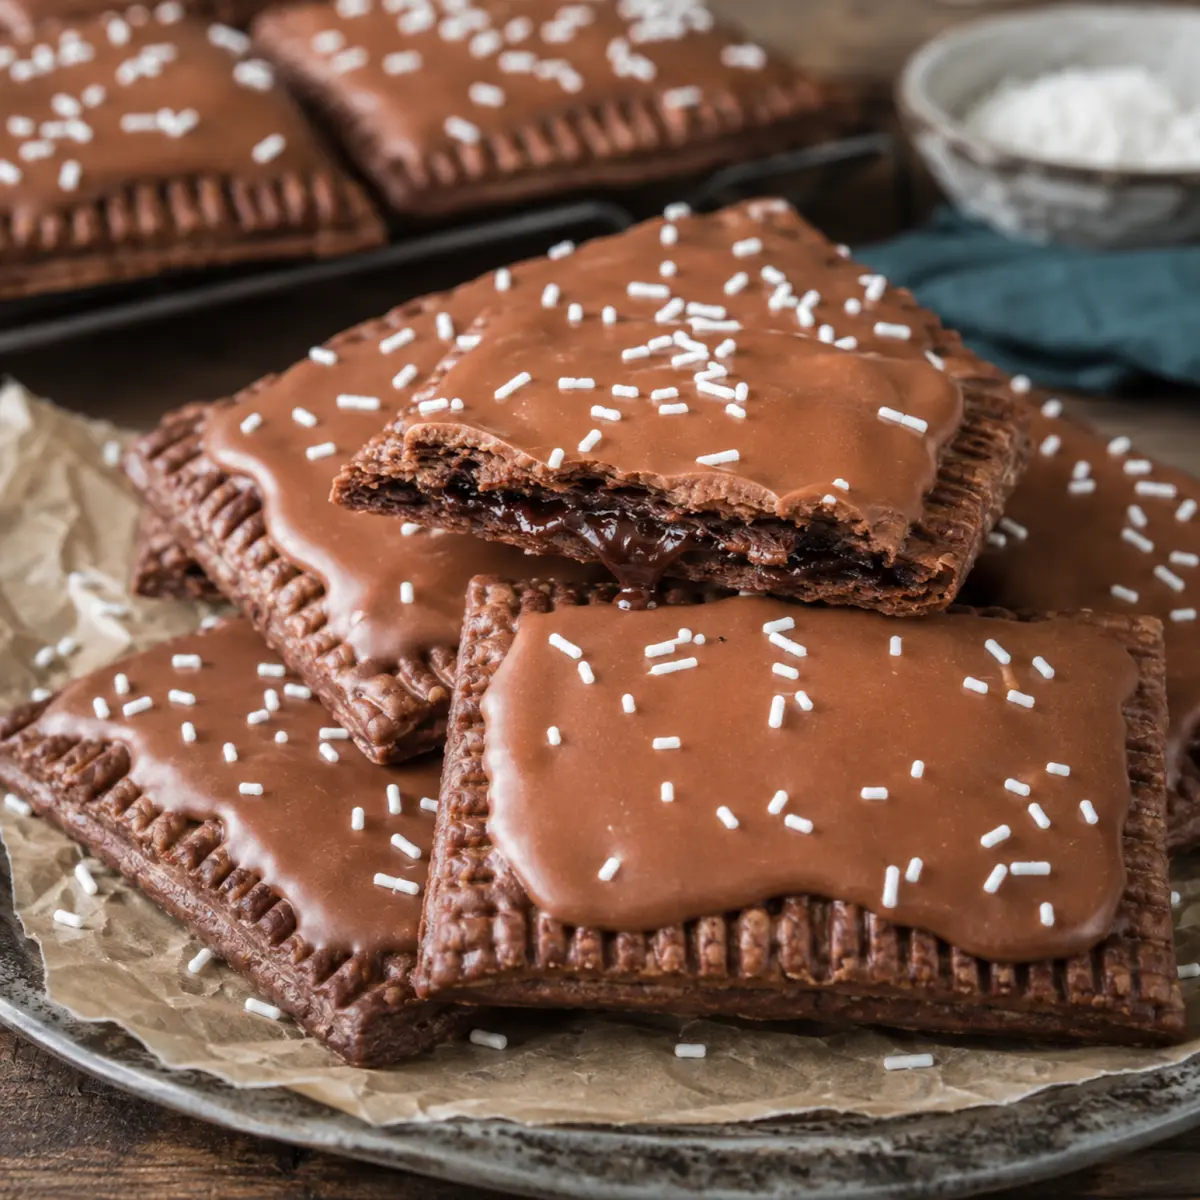
Biting into a homemade chocolate pop tart is like hitting the breakfast jackpot. Not only do you get the nostalgic joy of a breakfast classic, but you also experience a depth of flavor and freshness that never comes from a box. The pastry is buttery and tender, with a hint of cocoa that runs right through the crust.What really sets these apart is the rich, creamy chocolate filling that becomes perfectly soft and fudgy after baking. Each tart is finished with a silky chocolate glaze and, if you like, a burst of sprinkles for a playful touch. They’re just as fun to make as they are to eat, making them a perfect baking project for a cozy weekend morning with family—or a treat-yourself afternoon.
A Closer Look at Chocolate Pop Tart Ingredients
If you’ve ever wondered what goes into creating the ultimate chocolate pop tart, here’s a breakdown of the ingredients that make every bite so irresistible. Each element adds its own character, from flavor and texture to rich, melt-in-your-mouth goodness.- Flour – Provides structure to the pastry crust; all-purpose works best for balancing tenderness and strength.
- Natural cocoa powder – Gives the pastry deep chocolate flavor and a beautiful dark color.
- Granulated sugar – Sweetens the dough and helps create a tender bite.
- Table salt – Enhances all the chocolate notes and balances the sweetness.
- Unsalted butter – Cubed and super cold, this makes the pastry flaky and rich.
- Sour cream – Adds moisture and tang for extra soft, tender dough.
- Semisweet chocolate chips – Melted into the filling for that gooey, fudgy center.
- Salted butter – Used in the filling, it brings out the chocolate’s intensity.
- Heavy cream – Adds silkiness to the filling and helps it set just right.
- Vanilla extract – Provides warmth and depth both to filling and icing.
- Powdered sugar – Sweetens the filling and is essential for the signature glossy icing.
- Large egg – Used for an egg wash, it helps the edges stick and gives the pastry a golden finish.
- Water – Just a splash in the egg wash to thin it out.
- Milk – Blends into the icing for a creamy texture.
- Light corn syrup – Gives the frosting its shine and keeps it perfectly spreadable.
- Nonpareils/sprinkles/coarse sanding sugar – Totally optional, but they add a pop of color and fun to each tart.
See the recipe card below for the full list of ingredients and measurements.
Step-by-Step: How to Make Homemade Chocolate Pop Tarts
Homemade chocolate pop tarts come together step by step: make the dough, prep the filling, assemble, bake, and finish with that dazzling chocolate icing.- Combine the dry ingredients: Add flour, cocoa powder, granulated sugar, and salt to your food processor and pulse until blended. You’re looking for a uniform brown mixture with no streaks of flour or cocoa.
- Cut in the butter: Scatter cold, cubed butter over the flour blend. Pulse until the mix looks like coarse crumbs. A few larger pieces of butter are totally fine—these help with diner-style flakiness in the final crust.
- Mix in sour cream: Add sour cream to the bowl and pulse again. Once the dough starts looking damp and begins to cling together (think soft, messy chocolate sand), you’re ready to move on.
- Shape and chill: Tip the shaggy dough onto a sheet of plastic wrap, press together gently, and form a disk. Wrap it up and chill in the fridge. This step lets the butter firm up and makes rolling a breeze.
- Prepare the chocolate filling: While the dough chills, melt chocolate chips, salted butter, and heavy cream together in a heatproof bowl. Stir until smooth and glossy. Off the heat, mix in vanilla and powdered sugar, and set aside to cool and thicken to a spreadable texture.
- Preheat and prep: Once your dough is sufficiently chilled, preheat the oven and line a baking tray with parchment paper. This keeps everything from sticking and makes cleanup easier.
- Roll and cut: Lightly flour your surface, roll out the dough to about a thin, even rectangle, and cut into uniform rectangles. A sharp knife or pizza wheel helps here.
- Egg wash and fill: Lay out half your rectangles on the tray, brush the tops with egg wash, and scoop a spoonful of cooled chocolate filling into the center of each.
- Top and seal: Place a second rectangle over each filled base, lightly press, then seal all around with a fork. Brush the tops with more egg wash for that golden finish, then poke a few holes in the top with a toothpick or skewer so steam can escape.
- Bake: Slide the tray into the hot oven until the tarts puff up slightly and the edges look firm. They should feel set but not overly crisp straight from the oven.
- Cool: Let the pop tarts firm up on the tray before moving or icing.
- Make the icing: Whisk powdered sugar, cocoa powder, milk, corn syrup, and vanilla in a bowl until smooth and shiny. You’re aiming for an icing that falls in thick ribbons when you lift your spoon.
- Decorate: Spoon icing onto the cooled pop tarts. If you’re feeling playful, add sprinkles or sanding sugar. Let the icing set until it firms to the touch.
Mastering the Art of Chocolate Pop Tarts
Getting perfect homemade chocolate pop tarts is all about the details—here are some kitchen notes to help you dial in the texture and troubleshooting.- Work with very cold butter: If your kitchen runs warm, chill the flour and bowl briefly. Visible butter flecks mean extra flakiness in the baked pastry.
- Don’t overwork the dough: Handle it just enough to bring it together. Overmixing can make the crust tough instead of tender.
- Let the filling cool: Warm chocolate filling can melt the pastry and make assembly tricky. Cooled, it thickens and stays in place while you seal.
- Seal thoroughly: Use a fork to crimp the edges so the filling doesn’t leak during baking. Press with confidence for pretty, defined edges.
- Watch the baking time: The tarts should look puffed and set. Overbaking makes them dry; underbaking leaves them too soft in the center. Look for a slightly firm edge and a gentle give in the middle.
- Icing consistency: For picture-perfect pop tarts, your glaze should keep its shape briefly before settling—if it’s too thin, add more powdered sugar; too thick, a splash more milk does the trick.
Common mistakes to avoid? Rushing the chill time, overfilling (tempting, I know!), and skipping the little holes in the tops, which are important for venting steam and even baking.
Creative Variations and Perfect Pairings
There’s no need to stick with just one flavor profile—this is where homemade chocolate pop tarts really shine! You can swap out the filling for other favorites: try chocolate hazelnut spread, fruity jam, or even a dollop of thick peanut butter for an extra-rich twist.Not feeling sprinkles? Go for a dusting of flaky salt for a sweet-and-salty contrast, or drizzle with a little warmed peanut butter. These pop tarts are right at home on a brunch table with fresh strawberries, a dollop of whipped cream, or alongside a frothy cappuccino. Kids love them with a cold glass of milk, while adults may sneak one for dessert with espresso.
If you want to get creative with the icing, add a little instant espresso powder for a mocha spin or a drop of peppermint extract come winter. Feel free to play with the size and shape—heart-shaped tarts or minis make a fun treat for special occasions or lunchboxes.
Keeping and Reheating Your Chocolate Pop Tarts
Homemade pop tarts are at their best the day you bake them, but you can store them for when a chocolate craving hits. Once completely cool and the icing is set, pop tarts keep well in an airtight container at room temperature for a couple of days.For longer storage, refrigerate for several days or freeze (layering with parchment so they don’t stick) for up to a few weeks. Thaw overnight in the fridge if frozen. To reheat, a short stint in a toaster oven revives their crisp edges—just be gentle so you don’t melt or burn the icing. A quick microwave warm-up works too, but be aware the pastry won’t be as crisp. Always check that the centers are heated through before serving.
FAQs about Homemade Chocolate Pop Tarts
Can I make homemade chocolate pop tarts ahead of time?
Yes, you can make them in advance. Prepare, bake, and ice as directed, then store in an airtight container. They keep well at room temperature or in the refrigerator for several days.
What’s the best way to reheat homemade chocolate pop tarts?
The best method is using a toaster oven or a low oven until warmed through. Avoid high heat settings to prevent burning the icing, or try a quick microwave zap if you don’t mind softer pastry.
Can I freeze homemade chocolate pop tarts?
Absolutely—freeze them once cooled and set, ideally before icing for best texture. Thaw at room temperature or gently warm in a toaster oven for a crisp bite.
How do I keep the chocolate filling from leaking out?
Properly sealing the edges with a fork and venting the tops prevents leaks. Make sure the filling is cooled and not overfilled, and chill the assembled tarts briefly before baking if your kitchen is warm.
Enjoy Every Bite of Homemade Chocolate Pop Tarts
Homemade chocolate pop tarts transform a childhood favorite into a true bakery-style treat. Every layer—crisp pastry, rich filling, and smooth icing—comes together for a morning (or anytime) sweet that’s as fun to look at as it is to devour. I hope your kitchen smells like cocoa and that you find a little extra joy in each bite—especially when you catch that first drizzle of glossy icing setting just right.What To Try Next
Since you loved baking your Homemade Chocolate Pop Tarts, here are a few sweet treats and breakfast ideas to explore next.
- Homemade Strawberry Sheet Pan Pop Tart — shares the fun pop tart baking technique with a fresh berry twist.
- Mini Chocolate Tarts — a great choice for chocolate lovers looking to try a rich, bite-sized dessert.
- Strawberry Danish — enjoy another flaky, sweet pastry that makes a perfect breakfast companion.
Recommended Equipment
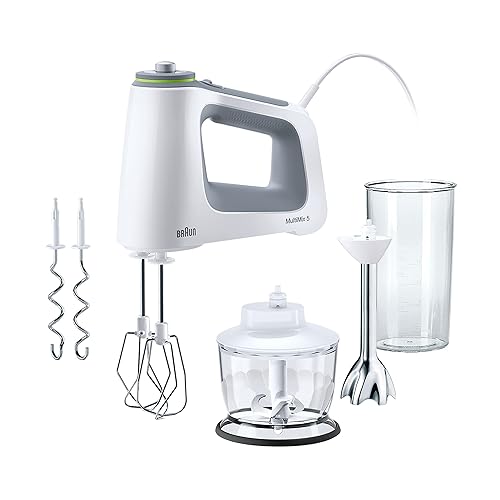
* As an Amazon Associate, I earn from qualifying purchases. There is no extra cost to you.

Homemade Chocolate Pop Tarts
Ingredients
Equipment
Method
- Combine flour, cocoa powder, granulated sugar and salt in the basin of a food processor and pulse briefly to combine.
- Scatter cubed butter evenly over the surface of the flour mixture and pulse until the butter is cut into the mixture and mixture resembles coarse crumbs. Discernible pieces of butter may remain in the mixture, this is fine!
- Add sour cream and pulse until dough is beginning to cling together. It may still be a bit crumbly but the flour and cocoa should be absorbed and if you press the dough between your thumb and forefinger it should stick together.
- Remove from food processor and transfer to a piece of plastic wrap. Flatten into a disk and chill for at least 30-60 minutes before rolling out. In the meantime, prepare your filling.
- Combine chocolate, butter, and cream in a heatproof bowl and heat in 25-second increments until melted and smooth.
- Stir in vanilla extract and powdered sugar until smooth.
- Set aside, filling should cool (and will thicken some) before being used to fill pastry.
- Once pastry dough has chilled, preheat your oven to 400F (205C) and line a baking sheet with parchment paper.
- Prepare egg wash by thoroughly whisking together egg and water.
- Transfer pie crust to a clean, lightly floured surface and dust with additional flour as needed. Roll dough into a rectangle about ⅛-¼” thick and cut into 2.5”x4” (6x10cm) rectangles.
- Place one rectangle on the prepared baking sheet and lightly brush the surface with egg wash.
- Drop a rounded Tablespoon of chocolate filling into the center, then top with another rectangle of dough. Use a fork to crimp the sides to seal and brush the surface of the dough with egg wash. Use a toothpick or wooden skewer to poke 6-8 holes in the surface of the pop tart to allow it to vent.
- Repeat the steps above until you have formed all of your chocolate pop tarts, then transfer to 400F (205C) oven and bake for 15-17 minutes. Allow to cool on baking sheet before decorating with icing.
- Combine sugar, cocoa powder, milk, corn syrup, and vanilla extract and whisk until combined. If mixture is too thick, add additional milk as needed until smooth, and if icing becomes too thin, you can always thicken it with a bit more powdered sugar. Look for a consistency where, when you lift the spoon out of the icing, the ribbon of icing that drizzles back into the bowl holds its shape for several seconds before dissolving back in the icing.
- Spoon icing over the center of the pop tarts and top with sprinkles, if using. Allow frosting to harden before serving and enjoying.