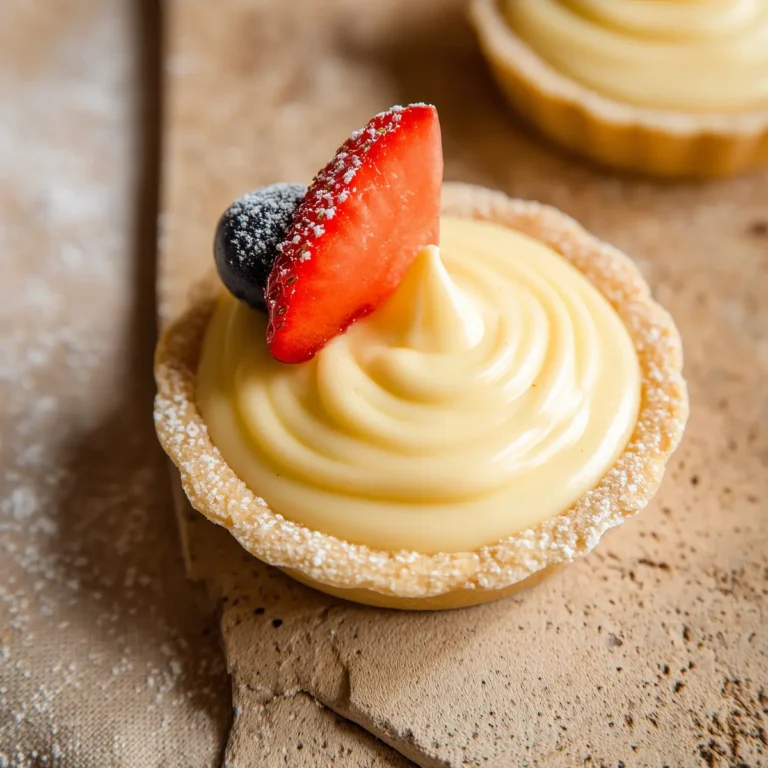
Before I even preheated the oven, I could already see these 30-Minute Mini Cream Pastry Cups coming together—a golden, gently crisp shell filled with fluffy, vanilla-kissed cream. You know those moments when you want something that looks impressive but is secretly wildly easy? That’s what these little beauties deliver. All the satisfaction of classic cream-filled pastries—just in grab-and-go tiny cups that are perfect for any gathering or solo treat on the couch.
If you love a dessert that combines pillowy whipped cream with buttery, tender pastry (and, let’s be honest, who doesn’t?), you’ll adore these mini cream pastry cups. They always steal the show at brunches, birthday parties, or whenever you need a quick sweet fix. I make a batch when I want everyone to think I have pastry chef skills, even on my laziest days.

Why These Mini Cream Pastry Cups Work for Every Occasion
What makes these 30-Minute Mini Cream Pastry Cups shine is their magic mix of simple ingredients, speed, and absolute crowd-pleasing appeal. Seriously—no matter what event you bring them to, they’re always the first bite to disappear. Maybe it’s the satisfying contrast: buttery, crumbly pastry cradling a mound of silky cream with that faint vanilla fragrance blooming at every bite.
They’re just at home on a fancy dessert table as they are on a Tuesday night, turning “just because” into a little celebration. You get all the rich flavor of a bakery tartlet, but without all the chilling, folding, and fussing. And because they’re mini, you can have one… or five! No plates required, no utensils needed, just happy hands grabbing another.
For last-minute parties, holiday gatherings, or an easy baking project with kids, these mini pastry cups are a go-to you’ll turn to again and again. Plus, with a fast bake and no tricky steps, even baking beginners pull these off like a pro.
What’s Inside These 30-Minute Mini Cream Pastry Cups
Here’s a peek at the ingredients bringing these mini cream dreams to life:
- flour – forms the base of the pastry, giving just enough structure and tender crumb.
- butter – chilled and cubed for that signature flakiness and buttery flavor in every bite.
- sugar – a hint mixed into the dough for subtle sweetness that rounds out the pastry.
- salt – balances and highlights all the flavors, making the buttery notes and cream pop.
- heavy cream – whips into dreamy, soft peaks that fill each cup with rich, airy fluff.
- vanilla extract – infuses the filling with a warm, comforting aroma you’ll crave.
- powdered sugar – for sweetening the cream and a final, pretty dusting on top.
See the recipe card below for the full list of ingredients and measurements.
Making 30-Minute Mini Cream Pastry Cups: Your Step-by-Step Guide
Time to fire up the oven and start assembling! Here’s how you’ll get those buttery mini cups and that luscious cream filling, all with zero fancy equipment or pastry chef training required.
- Fire up your oven and let it heat to a gentle medium setting—these pastry cups get their perfect golden edges when not blasted with too much heat.
- In a mixing bowl, stir together the flour, a sprinkle of sugar, and just a pinch of salt. It’ll smell like fresh, clean sweetness.
- Toss in your cold cubes of butter. Cut and squish the butter into the flour using your fingertips or a pastry cutter, mixing until you see fine, sandy crumbs—think crumb topping for a fruit crisp.
- Grab a mini muffin tin and start pressing small spoonfuls of dough into each cup. Use your knuckle or thumb to nudge the dough up the sides, making a little well for the creamy filling. Don’t worry about being too precise—rustic edges are charming here.
- Slide the tin into the oven and let the pastry bake until just barely golden. Aromas of butter and sugar will fill the kitchen. The cups will look dry on the surface with a faintly honeyed hue around the edges.
- While the pastry shells cool, it’s cream time. Pour your cold heavy cream into a bowl, then add a splash of vanilla and a handful of powdered sugar. Whip everything together until stiff, glossy peaks form—you’ll know it’s ready when the cream holds shape and the whisk leaves behind soft ridges.
- Once the pastry shells are cool to the touch, fill each one with a generous dollop (or piping swirl) of whipped cream. The contrast between crisped pastry and cloud-like filling is pure magic.
- If you’re feeling fancy, sift a veil of powdered sugar over the top right before serving. Chill the filled cups briefly, or serve right away for instant happiness.
Top Tips for Successful Mini Cream Pastry Cups Every Time
Mini bakes can be sneaky: just a little adjustment can take your 30-Minute Mini Cream Pastry Cups from good to utterly melt-in-the-mouth.
Start with totally cold butter—seriously, don’t let it soften. That’s how you get those delicate layers rather than greasy, limp pastry. If the dough feels too sticky, a quick pop in the fridge before pressing it into the tins works wonders.
When shaping the cups in the muffin tin, use light pressure and aim for a thin, even shell so every bite is crisp, never gummy. If you find the dough sticking, dust your fingers with a touch of flour.
Keep a watchful eye as your pastry bakes; mini cups can go from golden to overdone in a blink. Pull them when you see the slightest browning on the edges—they’ll continue firming as they cool.
For the whipped cream, always use very cold heavy cream. Beat until the texture holds peaks but isn’t grainy; over-whipped cream can suddenly break and lose that dreamy, smooth finish.
Store any filled cups in the fridge if you’re not serving right away, but these are best enjoyed fresh for maximum crunch and creaminess.
Mini Cream Pastry Cup Variations and Fun Serving Ideas
One of the best things about 30-Minute Mini Cream Pastry Cups is how endlessly you can play with flavors and toppings. Here’s how I like to change things up, depending on the mood or the season.
Try folding a touch of citrus zest—lemon, orange, or even lime—into your whipped cream filling for a sunny, tangy twist. A spoonful of berry jam or fruit compote under the cream turns each cup into a mini berry tart.
Craving chocolate? Drizzle melted chocolate over the tops, or swap half the sugar for cocoa in the cream for a double-chocolate bite. If you want a bit of festive flair, sprinkle tiny colored sugar, edible glitter, or toasted coconut flakes over each cup.
For parties, set out a little “build your own” station: unfilled pastry cups, a bowl of cream, and toppings like crushed nuts, mini chocolate chips, or fresh berries. Kids and grown-ups both love customizing their cups.
They pair beautifully with coffee, black tea, or a sparkling glass of Prosecco. For brunch spreads, add a fresh fruit salad and a handful of roasted nuts for balance. In cooler months, spiced whipped cream—cinnamon and nutmeg stirred into the filling—transforms these into tiny holiday treats.
If you want to prep ahead, you can bake and store the empty cups (airtight container, room temp) for a day before filling. Whip and fill with cream just before serving for the best texture.
FAQs about 30-Minute Mini Cream Pastry Cups
What’s the best way to store 30-Minute Mini Cream Pastry Cups?
Keep any leftover filled cups in the fridge in a tightly sealed container. They stay freshest when eaten within a day, as the cream and pastry texture are at their peak. If you’re prepping ahead, store the baked empty cups at room temperature and fill them right before serving.
Can I freeze mini cream pastry cups?
You can freeze the unfilled pastry shells once they’ve cooled completely—just pop them in a freezer-safe bag or airtight box. Let them thaw at room temperature before filling with cream. I don’t recommend freezing the cream-filled cups, as the whipped cream can separate and lose its lovely texture.
How can I customize the filling in 30-Minute Mini Cream Pastry Cups?
The whipped cream is a blank canvas! Try swirling in fruit preserves, a little melted chocolate, or flavored extracts (like almond or orange). Top with diced fruit, berries, or crushed cookies for an extra-special dessert cup.
Can I make these pastry cups gluten free or dairy free?
It’s totally doable—use a gluten-free all-purpose flour blend for the pastry (texture may be slightly crumblier) and swap in a plant-based butter and a dairy-free whipping cream alternative for the filling. Check labels to make sure everything is certified gluten free or dairy free as needed.
There’s something so satisfying about a tray of 30-Minute Mini Cream Pastry Cups—crisp, golden shells filled with clouds of pillowy cream, all ready for you to savor with your fingers. These bite-sized treats turn even a random weeknight into a little celebration and somehow make every moment feel just a bit more special. Set them out for a party, bring a plate to the office, or tuck a couple away for your own after-dinner indulgence. However you serve them, expect smiles and empty trays in no time. Enjoy every creamy, buttery bite!
More Delicious Recipes
- Italian Cream Bombs: These creamy treats feature a delightful filling that pairs perfectly with your mini cream pastry cups.
- St Patrick’s Day Brownie Trifle: This layered dessert complements the simplicity of mini cream pastry cups while adding a fun twist for celebrations.
- Green Velvet Cupcakes with Cream Cheese Frosting: These festive cupcakes share a similar creamy filling vibe that fans of the pastry cups will love.
30-Minute Mini Cream Pastry Cups: Irresistibly Delightful Treats
Ingredients
Equipment
Method
- Preheat oven to 350°F (175°C).
- Mix flour, sugar, and salt in a bowl.
- Cut in butter until mixture resembles crumbs.
- Press dough into mini muffin tins to form cups.
- Bake for 15 minutes until golden.
- Whip cream with vanilla and powdered sugar until stiff peaks form.
- Fill cooled pastry cups with cream.
- Serve chilled.