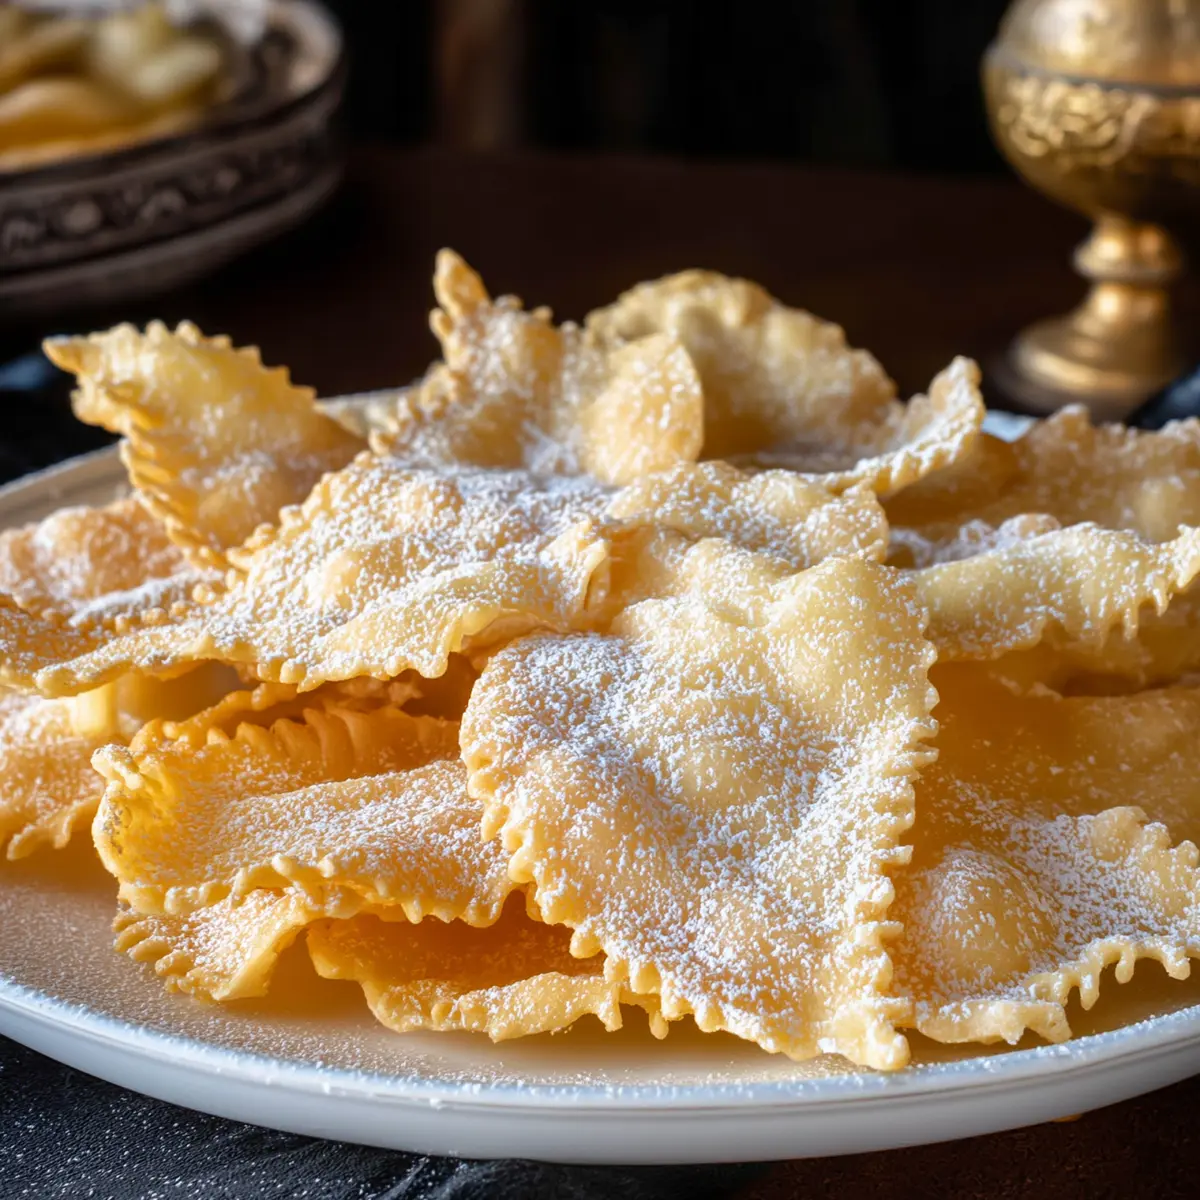
If you’ve been searching for an Italian treat that’s impossibly light, crisp, and just sweet enough to make you reach for another, you’re in the right place. Crostoli belong at every celebration—these little ribbons of fried dough dusted with a cloud of powdered sugar are the unofficial signal that something festive is underway. The first time you drop a batch into hot oil and hear the bubbling dance, you’ll understand why they’re always the first thing to disappear at a holiday table.
Golden and flaky, Crostoli basically melt away with each bite. They’re known by dozens of names depending where your family comes from—chiacchiere, angel wings, bugie—but the joy is universal. Let’s make a batch that captures that old-school Italian bakery charm right from your own kitchen.
Why Crostoli Are Italy’s Ultimate Festive Treat
It’s not truly Carnevale, Christmas, or any proper party in Italy without a plate of Crostoli waiting to be devoured. The magic of these wafer-thin pastries lies in their texture—delicate but crackling with every munch—and their feather-light touch of sweetness.
Crostoli aren’t just cookies; they’re a promise of something special, whether it’s the start of Lent, a family reunion, or those cozy afternoons when you’re baking just for the joy of it. They bring people together around the kitchen table, dusting everyone and everything in powdered sugar and leaving behind a trail of happy, sticky fingers.
What sets Crostoli apart from other Italian desserts is how little fuss they require—no need for rich fillings or heavy frostings. The dough comes together simply, and the real fun is in the shape-twisting and frying. Once you’ve made one batch, you’ll want to make them every time laughter’s in the air.
Crostoli Ingredients Up Close
- Flour: this forms the airy yet sturdy backbone of the dough; all-purpose gives that classic snap.
- Eggs: essential for richness and structure—add color and keep the dough tender.
- Egg yolk: brings extra silkiness to the final pastry.
- Granulated white sugar: just enough for a hint of sweetness without overpowering.
- Butter: softens the dough, makes it easy to stretch, and gives richness.
- Brandy: a subtle lift in flavor, helps keep the crostoli crisp; you can swap for another spirit if needed.
- Vanilla extract: fragrances the dough with a cozy, sweet aroma.
- Salt: sharpens the other flavors and stops things from tasting flat.
- Peanut oil for frying: creates that signature crackle and leaves less taste behind than olive oil or others.
- Powdered sugar: the snowy touch that makes every piece glisten (and your counter, too).
See the recipe card below for the full list of ingredients and measurements.
Smart Swaps for Crostoli Ingredients
Let’s say your pantry’s looking a little bare or you want to adjust Crostoli to suit everyone at the table. Don’t stress—this dough is forgiving!
If you’re avoiding alcohol, simply replace the brandy with fresh citrus juice like lemon or orange, which bumps up brightness and still keeps the pastry tender. No peanut oil? Use another neutral-tasting oil with a high smoke point such as sunflower or canola. Gluten-free flours can work for Crostoli, but stick to a reliable all-purpose blend—just expect a more delicate texture.
Prefer a dairy-free treat? Swap the butter with a good-quality plant-based margarine. And if you’re fresh out of eggs, you can try a mixture of flaxseed and water, though the results will be less golden and crisp. Play around and you might stumble on your new favorite type of angel wing cookie.
Mastering the Crostoli Method
Getting the perfect batch of Crostoli doesn’t require pastry school—just a little know-how and a bit of patience (plus a willingness to dust yourself in sugar). Here’s how I like to do it:
- Start by making a mound of flour on your clean countertop and create a wide well in the center. Crack the eggs and add the egg yolk into the well, tossing in the sugar, softened butter, a dash of brandy, vanilla extract, and salt.
- Using your fingers or a fork, gently work the wet ingredients into the flour, pulling in a little flour at a time. If things get dry or crumbly, just add a splash more brandy (or even a tiny bit of water) until you can knead everything into a soft, elastic ball.
- Once your dough feels smooth and springy, cover it and let it rest. This downtime makes the dough easier to roll out super thin—essential for proper Crostoli crunch.
- When you’re ready, slice off a small chunk of dough and use a pasta maker (or a rolling pin if you want a mini workout) to roll it out as thin as you dare. The thinner, the better—aim for ribbons you could almost see through.
- Cut your dough into strips, then make a little slit in the center of each. Twist one end through the slit to create that classic bow shape. Each one can look a bit different—it’s all part of the charm.
- Heat up your oil in a sturdy, high-sided pan. You want it hot, but not smoking—test with a little scrap of dough; it should sizzle and puff up quickly.
- Work in small batches, gently lowering each pastry into the oil. Flip after a few moments when they’re pale gold and bubbling—don’t step away, they’re fast!
- Pull them out with tongs or slotted spoon and let them drain on paper towel. They’ll crisp up perfectly as they cool.
- Once cool, shower with powdered sugar—don’t be stingy!—and stack them up on a platter. Try not to eat them all before the guests arrive.
Crostoli Success: Tips from By Nonna’s Kitchen
Making Crostoli isn’t tricky, but a few small details can really set your batch apart. Knead your dough just enough for it to be elastic and smooth—a little arm work now means lighter, airier pastries later.
Allow the dough its time to rest before rolling out. If you’re working in a chilly kitchen, let it sit somewhere warm; tough dough is the enemy of those lacy ribbons. Roll the dough super thin. Thicker dough makes dense, chewy crostoli, which is a shame when you want shattering crispiness.
Don’t rush the frying stage or crowd the pan. Keep an eye out for the color—they should stay pale golden, never dark brown. If they brown too quickly, your oil’s a bit too hot. If they just soak, crank up the heat a notch. Store your finished Crostoli in an airtight container and they’ll stay fresh for ages—assuming you can stop snacking on them.
Pairings and Variations for Your Crostoli
Crostoli are the definition of a party snack—served alongside a bubbling espresso, a dessert wine, or just as they are. They make a beautiful finish to a big Italian meal or an unexpected treat on New Year’s Eve. For something different, pair Crostoli with whipped cream or a simple chocolate sauce as an extra indulgence.
If you want to get playful, dust them with cinnamon sugar for a spicy twist, or add orange and lemon zest to the dough for a citrus burst. Some sprinkle them with a mix of almond meal and sugar for a nutty finish. Prefer a savory vibe? A dash of black pepper in the dough can turn Crostoli into a quirky appetizer that pairs surprisingly well with cheese boards.
Planning ahead? Crostoli are perfect for making in advance. They freeze beautifully (just layer them with parchment so they don’t stick) and are brilliant at room temperature, which makes them great for gifting, too.
FAQs about Crostoli
What is the difference between Crostoli and chiacchiere?
Crostoli and chiacchiere describe the same crisp, fried Italian pastry, but they go by different names in various regions. The recipes and results are nearly identical—you’ll find minor tweaks in shape or ingredients, but that signature crunch stays the same.
Can I make Crostoli without alcohol?
Yes, you can absolutely make Crostoli without alcohol. Simply swap the brandy for juice from a lemon or orange—this keeps the dough tender and adds a subtle zing without compromising the traditional texture.
What oil works best for frying Crostoli?
A neutral, high smoke-point oil like peanut, sunflower, or canola oil works best for Crostoli. These oils keep the cookies light, crispy, and free from any heavy flavors that could compete with the delicate pastry.
How long do homemade Crostoli stay fresh?
Homemade Crostoli can stay crispy and delicious for up to two weeks if stored in an airtight container. Just keep them in a cool, dry place and avoid the fridge, as humidity will make them lose their crisp texture.
Final Thoughts on Crostoli
Crostoli aren’t just a treat; they’re a little slice of celebration you can have any day you like. Their unique crispness and hint of sweetness make them just as welcome at a bustling Carnevale party as on a quiet Sunday with coffee.
If you’re looking to make something that brings people running to the kitchen, Crostoli are one tradition you’ll want to revisit year after year. And after you try them, you’ll see—stopping at one is truly impossible.
More Delicious Recipes
- Italian Cream Bombs: These delightful treats share that Italian pastry spirit, making them a perfect sweet companion to Crostoli.
- Cream Cheese Salami Roll-Ups: A savory snack that pairs wonderfully with desserts like Crostoli at any gathering.
- Chickpea Feta Avocado Salad: This fresh and satisfying salad can complement the sweetness of Crostoli during festive occasions.
Crostoli Recipe
Ingredients
Equipment
Method
- Place the all purpose flour on a clean work surface.
- Make a well in the centre. Add the eggs, egg yolk, sugar, butter, brandy, vanilla extract and salt.
- Use your fingertips or a fork to gradually blend the wet ingredient slowly gathering in flour until the dough starts to come together. Add a little more brandy if needed to form a ball.
- Knead for about 5 minutes until the dough is smooth and elastic.
- Rest the dough for 30 minutes.
- Cut small portion of dough off the “mother” dough.
- Flatten the smaller piece and begin to pass through the pasta machine on the widest setting.
- Fold and pass it through the widest setting. Continue to fold and pass through the pasta machine 5 or 6 times until the dough is smooth.
- Dust with extra flour as required.
- Begin to reduce the setting until you are at the finest setting.
- Pass the dough through the finest setting and place the length of dough on to your work surface. With the Kitchen Aid Pasta roller, I find I need to go through the thinest setting twice. You could also manually (but carefully) stretch the dough to ensure it is as thin.
- Cut the dough along the length into about 2 inches (5 centimeter) strips which will be approximately 4 -6 inches (10-15 centimeters) long. This is just to give you an idea but really how you cut is up to you.
- I make a small cut in the middle of each piece and twist one end through the cut, as you can see above.
- Heat oil in a heavy, high sided frypan.
- When the oil is hot (350°F/180ºC) slip in 3 or 4 crostoli (or more depending on the diameter of the frypan).
- Work quickly because they take about 30 seconds (or less) to cook on each side if you have the oil hot enough. Turn them (I like to use two forks) once a lot of bubbles have formed and before they colour too deeply. Crostoli should be light golden in colour. If they are brown, they are burnt.
- When cooked on both sides, remove them and drain them on absorbent paper. Crostoli will be a little soft but will become more crisp on cooling. If crostoli take too long to cook, it means that the oil is not hot enough, and they will absorb too much oil, resulting in heavy crostoli.
- When cool, dust generously with powdered sugar.
- Store in an airtight container for two weeks.