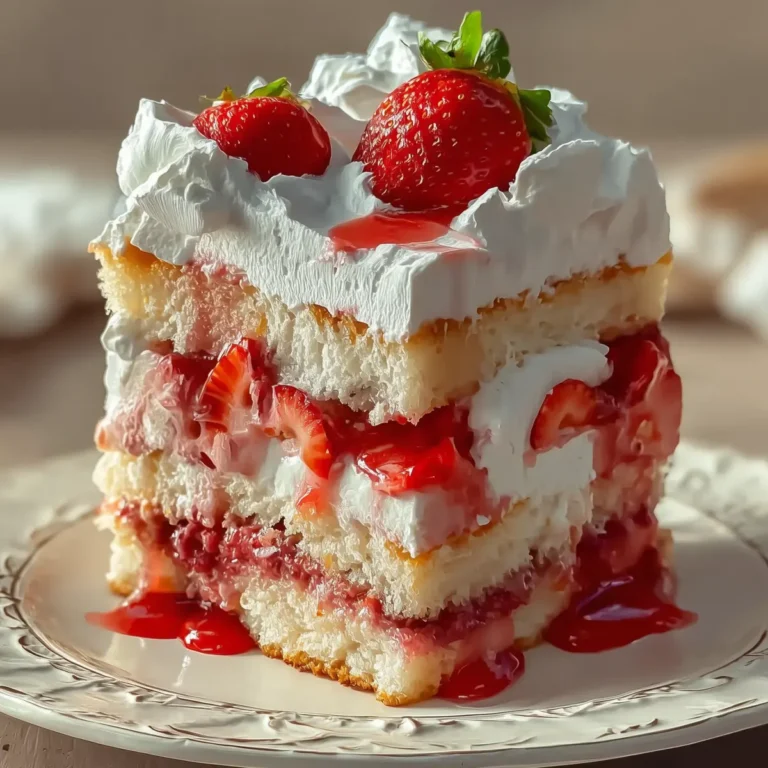
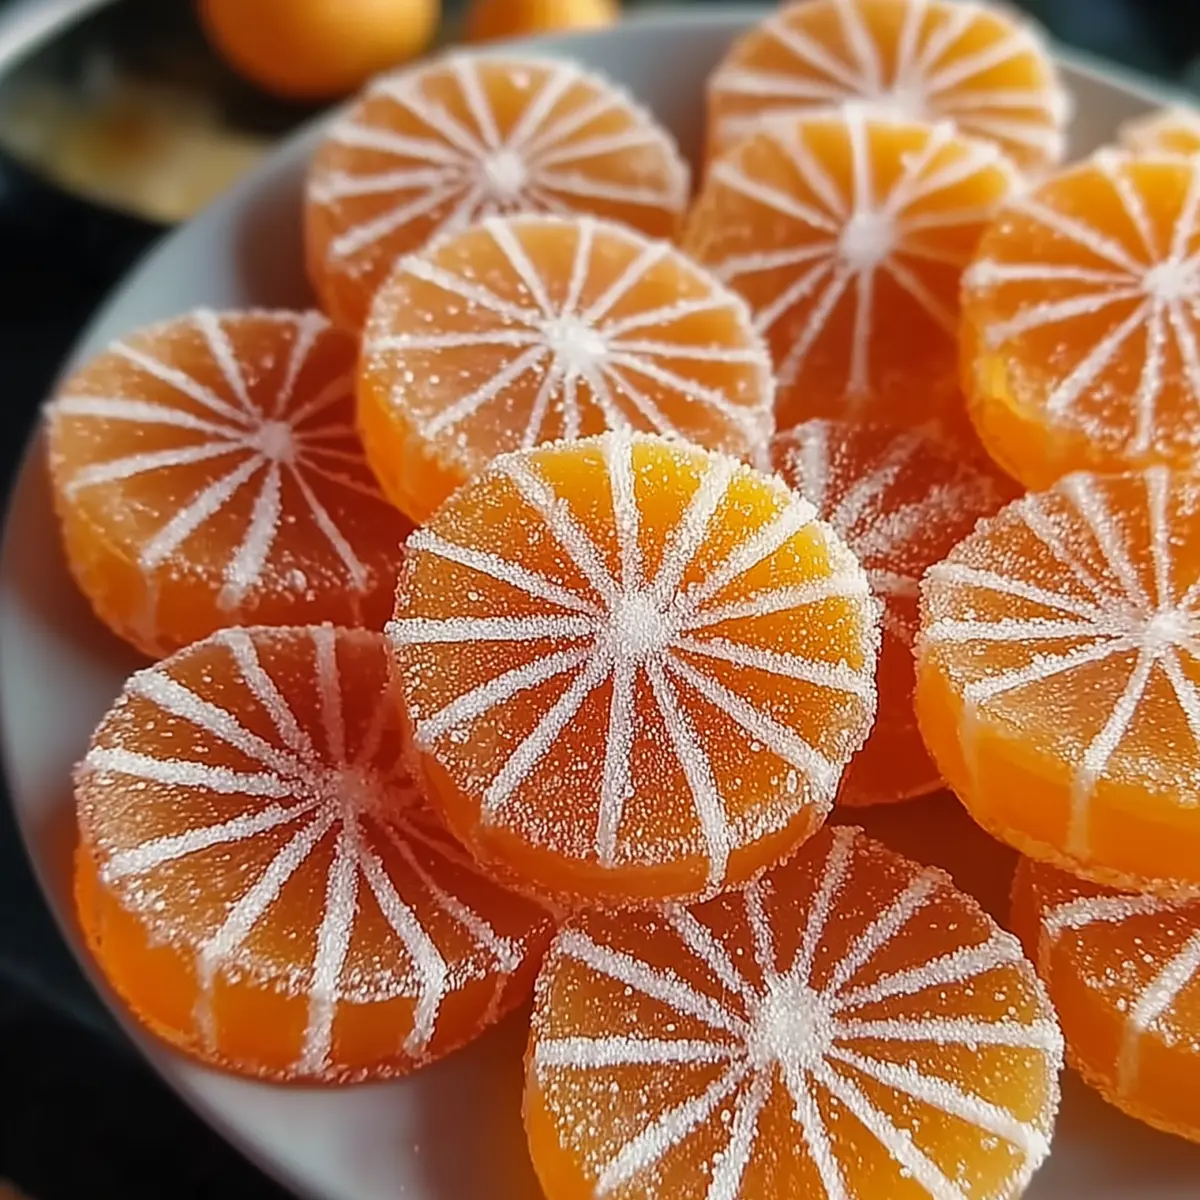
If you’re craving a bright, chewy treat that tastes like pure sunshine, you’re in the right place. Homemade Orange Candy is all about capturing the freshest citrus flavor with minimal fuss—just a few simple steps and a short list of ingredients. There’s something magic about turning humble oranges into glossy, jewel-like slices with that perfect balance of sweet and tangy.
What I love most: you get the essence of real fruit in every bite, whether you’re nibbling these on their own, sprinkling them on yogurt, or tucking them into lunchboxes for a pop of color. And if you’ve never made your own candy before, don’t stress—this recipe doesn’t require special gadgets or candy thermometers, just a bit of patience and a little anticipation as everything sets up.
Finding comfort in simple tools for Homemade Orange Candy
You really don’t need anything fancy to make homemade orange candy shine. Here’s what you’ll want handy:
- Sharp knife – For slicing oranges into even, thin rounds. The thinner, the better for that perfect candy texture.
- Cutting board – A sturdy surface to prep your fruit safely.
- Large skillet – Wide enough to let all your orange slices simmer in syrup comfortably.
- Measuring cups – For getting your sugar and water just right.
- Wire rack – Essential for drying the candy after cooking. You want air circulation all around each glossy slice.
- Baking sheet (optional) – Useful under the wire rack to catch any sticky drips as your slices dry.
No need for a candy thermometer or any advanced gear. I always feel a little more at ease when a big kitchen project can be tackled with the basics.
Zesty ingredients that bring orange candy to life
- Small oranges or tangelos – Fill your kitchen with citrus aroma and hit that sweet spot between tart and sugary. Look for fruit with firm skin—these hold their shape best.
- water – Key to dissolving the sugar and making the syrup that infuses the oranges with all that glossy sweetness.
- Granulated sugar – Delivers just the right crystallized texture, and don’t be tempted to use less—it’s what gives these treats their classic candy feel.
See the recipe card below for the full list of ingredients and measurements.
Making Homemade Orange Candy step-by-step, with love
- Slice your oranges into thin, even rounds (about 0.5 cm thick), taking care to remove any seeds. You’ll want each slice to shine like a tiny stained-glass window.
- Combine granulated sugar and water in a large skillet. Stir gently and heat over medium, watching as the sugar melts and the mixture comes to a gentle boil. The syrup will turn clear and ready for its citrus guests.
- Simmer orange slices by reducing the heat and adding them directly to your hot syrup. Let them bubble very gently for 45–60 minutes, flipping halfway if you’d like. You’ll know they’re ready when each slice turns translucent and looks jewel-like, with the syrup thickening up around them.
- Transfer to a wire rack using tongs or a slotted spoon. Lay each slice flat, keeping them separate to prevent sticking. Now comes the hardest part—drying for 24–48 hours. As they sit, the candy firms up while staying perfectly chewy in the center.
- Finish with a flourish by rolling the dried slices in sugar for sparkle, or dipping them halfway in melted chocolate for a festive twist. Completely optional, but so satisfying!
You’ll hear that gentle, sticky sound as the syrup curls away and your oranges go from simmered to candied perfection. That’s when you know it’s working.
Troubleshooting: keeping your orange candy perfectly chewy
Even simple recipes like this have their quirks, but with a few tips, you’ll sidestep all the sticky pitfalls:
- Slices too thick? That can lead to soggy centers. Aim for even rounds just under 0.5 cm thick for a tender bite.
- Syrup not thickening? Make sure you’re simmering long enough—if needed, give it a few more minutes. Watch for the syrup to cling and thicken, but don’t crank up the heat or the sugar may burn.
- Candy won’t dry? Humid days can slow things down. Set the wire rack in a cool, ventilated spot. If your slices are still sticky after 48 hours, dust lightly with extra sugar to absorb excess moisture.
- Slices stick together? Give each round its own space on the rack, and flip them once or twice while they dry.
- Don’t reduce the sugar even if you want to cut back—skimping affects both the candy texture and shelf life.
Honestly, the hardest part is resisting the urge to sneak a slice before they dry. Your patience will pay off, promise!
Pairing Homemade Orange Candy: fun variations and serving ideas
Homemade Orange Candy can steal the show solo, but it plays so well with others, too. Here are some of my favorite ways to serve and twist up the basic batch:
- Add a chocolate dip – Take your cooled slices for a dip in rich dark chocolate for a true citrus-chocolate hit. Great for gifting or fancy snacking.
- Roll in extra sugar – Give the finished slices a toss in more granulated sugar for a frosted sparkle and a crisp bite.
- Layer on cakes or pavlovas – Candied oranges look beautiful atop creamy desserts where their color and tang pop.
- Tuck into breakfast – Chop and sprinkle over yogurt, granola, or oatmeal for an unexpected morning treat.
- Mix with dried fruit and nuts – Make your own gourmet snack mix with a few chewy, orangey jewels.
- Try tangelos or other citrus – Expand your homemade candy horizons by swapping in blood oranges, mandarins, or tangelos for deeper colors and flavors.
Let your creativity lead—this recipe is your blank citrus canvas.
FAQs about Homemade Orange Candy
How should I store Homemade Orange Candy to keep it fresh?
Keep your cooled orange candy in an airtight container, and store it at room temperature. Lay parchment paper between layers to prevent sticking. It’ll stay chewy and bright for up to two weeks—if you can resist it that long!
Can I freeze Homemade Orange Candy for longer storage?
Freezing isn’t recommended for this type of candy, as it can cause the texture to become mushy or sticky upon thawing. For best results, enjoy your Homemade Orange Candy within a couple of weeks after making.
What are some fun ways to serve Homemade Orange Candy?
Serve them on dessert platters, dip them in chocolate, or chop and sprinkle over breakfast bowls. They also make gorgeous edible gifts, especially bundled in small cellophane bags or tucked into a homemade snack mix.
Wrapping up a bright batch of Homemade Orange Candy
There’s something special about the shimmer and tang of Homemade Orange Candy that instantly brightens even the dullest day. Each slice is a burst of citrus sunshine—chewy, sweet, and just a little bit nostalgic. Whether you’re savoring them on their own or sharing with friends, these little gems deliver all the zing and comfort of homemade with only the simplest steps. Go ahead, treat yourself to a batch and let every bite remind you that simple, seasonal ingredients really can work a little magic.
More Delicious Recipes
- St. Patrick’s Day Snack Board: A vibrant array of snacks that can be beautifully complemented with homemade orange candy.
- Italian Cream Bombs: A delightful dessert that pairs nicely with the zesty flavors of orange candy.
- Chickpea Feta Avocado Salad: This fresh salad could be topped with orange candy for an extra burst of sweetness and citrus flavor.
Irresistible Homemade Orange Candy That'll Brighten Your Day
Ingredients
Equipment
Method
- Slice 3 small oranges into ¼-inch rounds, removing any seeds.
- Combine 3 cups of granulated sugar with 3 cups of water in a skillet and heat until dissolved and boiling.
- Reduce heat and add the sliced oranges, simmering for 45-60 minutes until translucent.
- Remove slices and place on a wire rack to dry for 24-48 hours.
- Optionally roll in sugar or dip in chocolate for added flavor.