If you’ve ever craved the comfort of a cheeseburger but wanted something you could just grab and eat in your hands, Garlic Butter Beef Cheeseburger Rollups might just be your new favorite. There’s a mix of buttery crisp, soft cheesy melt, and that unmistakable garlicky aroma that comes together in under half an hour.
I love these on busy weeknights, or for game days when you want a classic crowd-pleaser that’s easy to eat (and dip). Every bite gives you the rich beef, golden flaky pastry, and gooey cheddar wrapped up in a savory swirl. Let’s dive in.
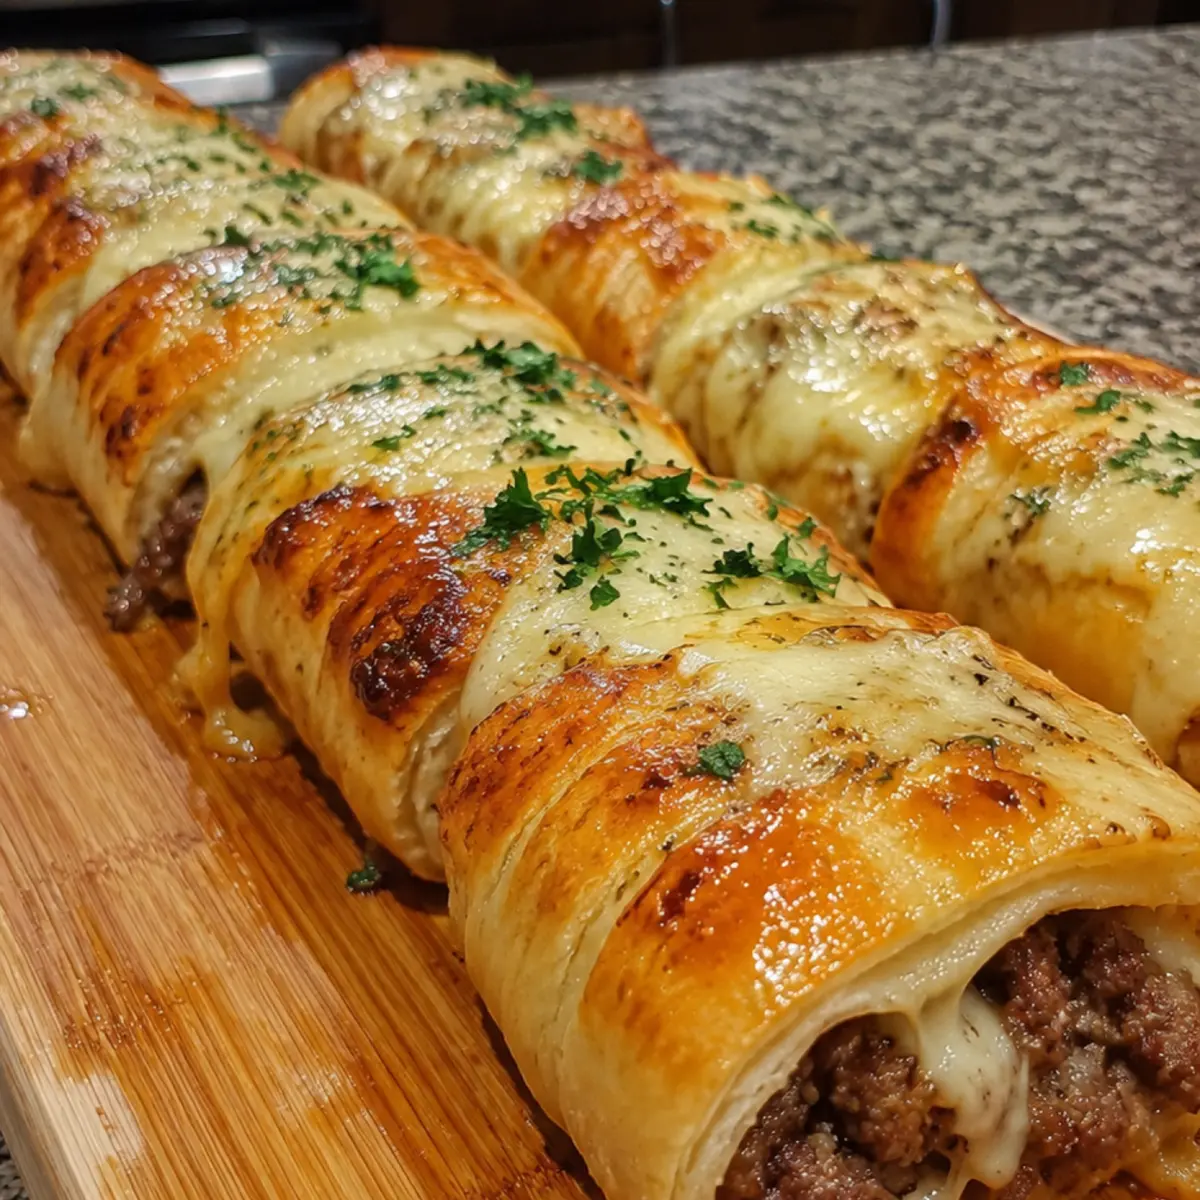
What Makes These Garlic Butter Beef Cheeseburger Rollups Irresistible
Some recipes are just meant for sharing, and Garlic Butter Beef Cheeseburger Rollups are in that club. It’s the flavor combo—juicy beef seasoned generously, melty cheddar oozing with every bite, all wrapped in flaky pastry that’s been brushed with buttery garlicky goodness. The smell alone will have friends and family drifting toward the kitchen before they’re out of the oven.These rollups work great for casual parties, lunchboxes, or whenever you want all the best parts of a cheeseburger (beef, cheese, softness, and a buttery crunch) with zero fuss. They freeze nicely, travel well, and can be served with whatever dips or sauces you love best. And, let’s face it: anything with garlic butter is hard to resist when the edges are golden and crisp.
Key Ingredients for Perfect Cheeseburger Rollups
When you start with just a few flavorful, everyday ingredients, big things happen. Here’s what you’ll need to make Garlic Butter Beef Cheeseburger Rollups come together perfectly:- Beef – The backbone of the filling, adding savory richness and a classic burger feel.
- Salt – Broadens and deepens the flavors throughout the filling.
- Black pepper – A little heat and sharpness to balance the richness.
- Minced garlic – Pungent, aromatic, and the star behind that buttery flavor.
- Onion powder – Rounds out the flavor with a mellow, savory sweetness.
- Shredded cheddar cheese – Melts beautifully, binding the beef and adding creamy sharpness.
- Unsalted butter – Softened and blended with herbs, for brushing over the pastry.
- Fresh parsley – Adds brightness and color to the buttery topping.
- Crescent roll dough sheets – The crisp, flaky vehicle holding it all together and giving each rollup that signature golden edge.
See the recipe card below for the full list of ingredients and measurements.
Step-by-Step: Making Garlic Butter Beef Cheeseburger Rollups
You don’t need to be a pro to make these rollups. Here’s how the process plays out, and what to watch for at each turn:- Preheat your oven so it’s hot and ready, and line a baking sheet with parchment paper for easy cleanup and nonstick baking.
- Brown the ground beef in a skillet over medium heat, seasoning with salt, black pepper, minced garlic, and onion powder. Keep stirring as the garlic becomes fragrant and the beef turns a rich golden-brown. Drain any excess fat to keep the filling flavorful but not greasy.
- Stir together the softened butter with the chopped fresh parsley in a bowl until flecked with green and creamy.
- Unroll your crescent dough sheets flat on the counter. Spread each with a thin layer of the garlic parsley butter—the smell alone is irresistible at this stage.
- Spoon the cooked beef mixture along the base of each sheet, keeping it to one end. Top the beef with a generous pinch of cheddar so there’s gooey cheese in every roll.
- Roll each sheet tightly from the wide end, tucking the filling as you go. You’ll end up with snug spirals, ready for the oven.
- Place the rollups seam-side down on your prepared baking sheet. Brush the tops gently with the remaining garlic butter for beautiful browning and extra flavor.
- Bake until the crescent dough is puffed, golden, and you hear a soft crackle as the butter bubbles. The edges will be deep golden brown with cheesy hints peeking out.
- Let them cool slightly—just enough so the molten cheese won’t burn fingers. Enjoy warm!
Getting the Golden Edge: Tips and Troubleshooting
Cheeseburger rollups are all about that balance: golden brown pastry, juicy filling, creamy cheese, and a hint of herb. Keep these cues and tips in mind for the best batch every time:- Don’t overfill the dough—leaving a little edge helps you seal each rollup so the cheese doesn’t burst out.
- If the beef mixture feels too wet, drain it well to help the crescent dough stay crisp.
- Brush the tops generously with the garlic butter and parsley for extra golden sheen and a bold garlicky flavor.
- Check for even browning: rotate your baking sheet if needed so each rollup finishes with a perfect golden crust.
- Let them cool a few minutes before serving; this allows the cheese to set so you get soft, gooey centers without scorching your mouth.
Serving Ideas and Creative Variations
Once you’ve mastered Garlic Butter Beef Cheeseburger Rollups, you’ll find endless ways to make them your own. Serve them hot with cool dips—think classic ketchup, creamy ranch, or a spicy sriracha mayo on the side.Want to mix it up? Use mozzarella for a milder cheese pull, add a slice of jalapeño before rolling for subtle heat, or sprinkle the buttery tops with a little sesame seed for a true burger vibe. These rollups also pair perfectly with crispy potato wedges, a fresh green salad, or oven-roasted veggies. For parties, serve them as finger food and let people dunk away.
Extra flavor? Try a swipe of yellow mustard inside with the beef. Even a little diced pickle or caramelized onion makes for a fun twist. Get creative with what’s in your fridge—these are forgiving, and always a hit.
Make-Ahead and Storing Your Rollups
One of the perks of cheeseburger rollups is how well they keep. If you have leftovers, let them cool completely and store in an airtight container in the fridge. To reheat, pop them back on a baking sheet in the oven until warmed through and the pastry is crisp again.They also freeze well: arrange cooled rollups in a single layer on a tray, freeze, then transfer to a zip-top bag. Reheat from frozen in the oven for best results—no need to thaw. For make-ahead, you can prepare the beef filling and garlic butter a day ahead, assemble just before baking, and enjoy fresh, gooey centers whenever the craving strikes.
FAQs about Garlic Butter Beef Cheeseburger Rollups
Can Garlic Butter Beef Cheeseburger Rollups be made ahead of time?
Yes, you can prepare the beef filling and garlic butter mixture ahead. Assemble and bake fresh for the best texture, or reheat already-baked rollups in the oven until hot and crisp.
How do you store leftovers, and how long will they stay good?
Store leftover rollups in an airtight container in the fridge for up to a few days. For longer storage, freeze them and reheat directly from frozen for a quick meal or snack.
What cheese works best for Garlic Butter Beef Cheeseburger Rollups?
Cheddar cheese is classic and melts beautifully, but mozzarella or a mix of your favorite cheeses will work, too. Choose a cheese that melts smoothly and adds a punch of flavor.
Why is my dough soggy or greasy?
Soggy dough can happen if the beef filling is too wet. Make sure to drain any excess fat from the cooked beef, and avoid overfilling the dough sheets for the ideal flaky texture.
Cheeseburger Rollups Finale
When you want big cheeseburger flavor in a shareable, snackable form, Garlic Butter Beef Cheeseburger Rollups deliver every time. They’re warm and buttery, packed with savory beef and gooey cheese, and always disappear the moment you put them out. Whether you serve them for a cozy dinner or as an easy gathering appetizer, you’ll love that first flaky, golden bite.What To Try Next
Here are some tasty picks to keep the flavor going after your rollups.
- Turkey Cheddar Roll Ups — another easy roll-up recipe with cheesy goodness and a different protein twist.
- High Protein Animal Style Burger Bowls — perfect for when you’re craving burger flavors in a lighter bowl meal form.
- Buffalo Chicken Sliders — great for a casual, flavorful party snack with a spicy contrast to beef.
Recommended Equipment

Lodge Yellowstone 26 cm Cast Iron Frying Pan
Perfect for searing beef rollups with butter and garlic
View on Amazon

Rösle Stainless Steel Deep Bowl
Ideal for mixing beef, cheese, and seasonings together
View on Amazon* As an Amazon Associate, I earn from qualifying purchases. There is no extra cost to you.

Garlic Butter Beef Cheeseburger Rollups
Ingredients
Equipment
Method
- Preheat the oven to 375°F (190°C). Line a baking sheet with parchment paper.
- Cook the ground beef with the salt, black pepper, minced garlic, and onion powder in a skillet over medium heat until browned. Drain off any excess fat.
- Mix the softened butter and chopped parsley in a separate bowl.
- Spread out the crescent roll dough sheets and apply a thin layer of the garlic butter mixture over each one.
- Add a hearty spoonful of the beef mixture near the base of each sheet and sprinkle with cheddar cheese.
- Roll each sheet from the wider end into a snug rollup.
- Place the rollups seam-side down on the prepared baking sheet. Brush the tops with the remaining garlic butter.
- Bake for approximately 20 minutes, or until golden brown.
- Let the rollups cool before serving.